Recently I found two very interesting articles about NSToolbar and NSSegmentedControl. One was written by Christian Tietze and the other by sanjeetsuhag.
During creating one of my projects I followed Chritian’s tutorial. Today, for another project I’d have liked to follow sanjeetsuhag but found myself a little lost, so decided to create a little more detailed article, I hope he won’t mind.
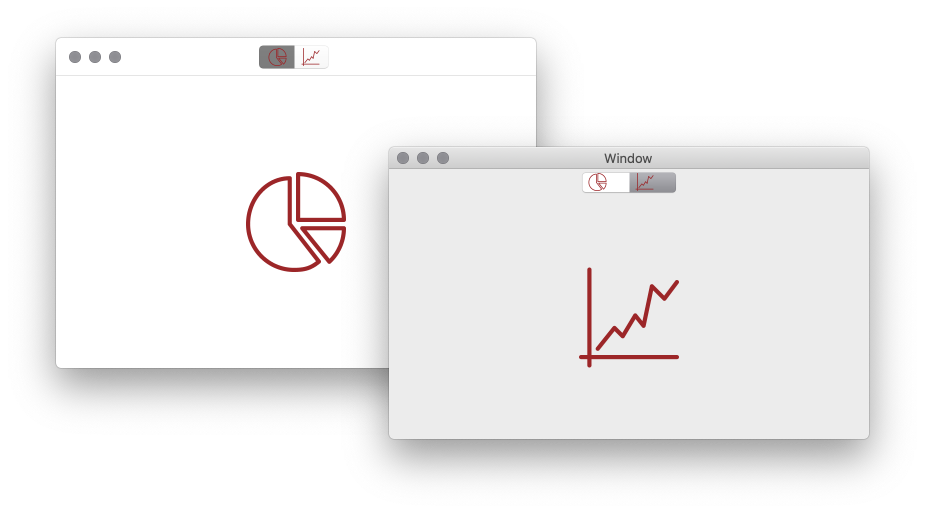
On the left hand side, our project and on the right hand side hwo it would look with standard AppKit elements.
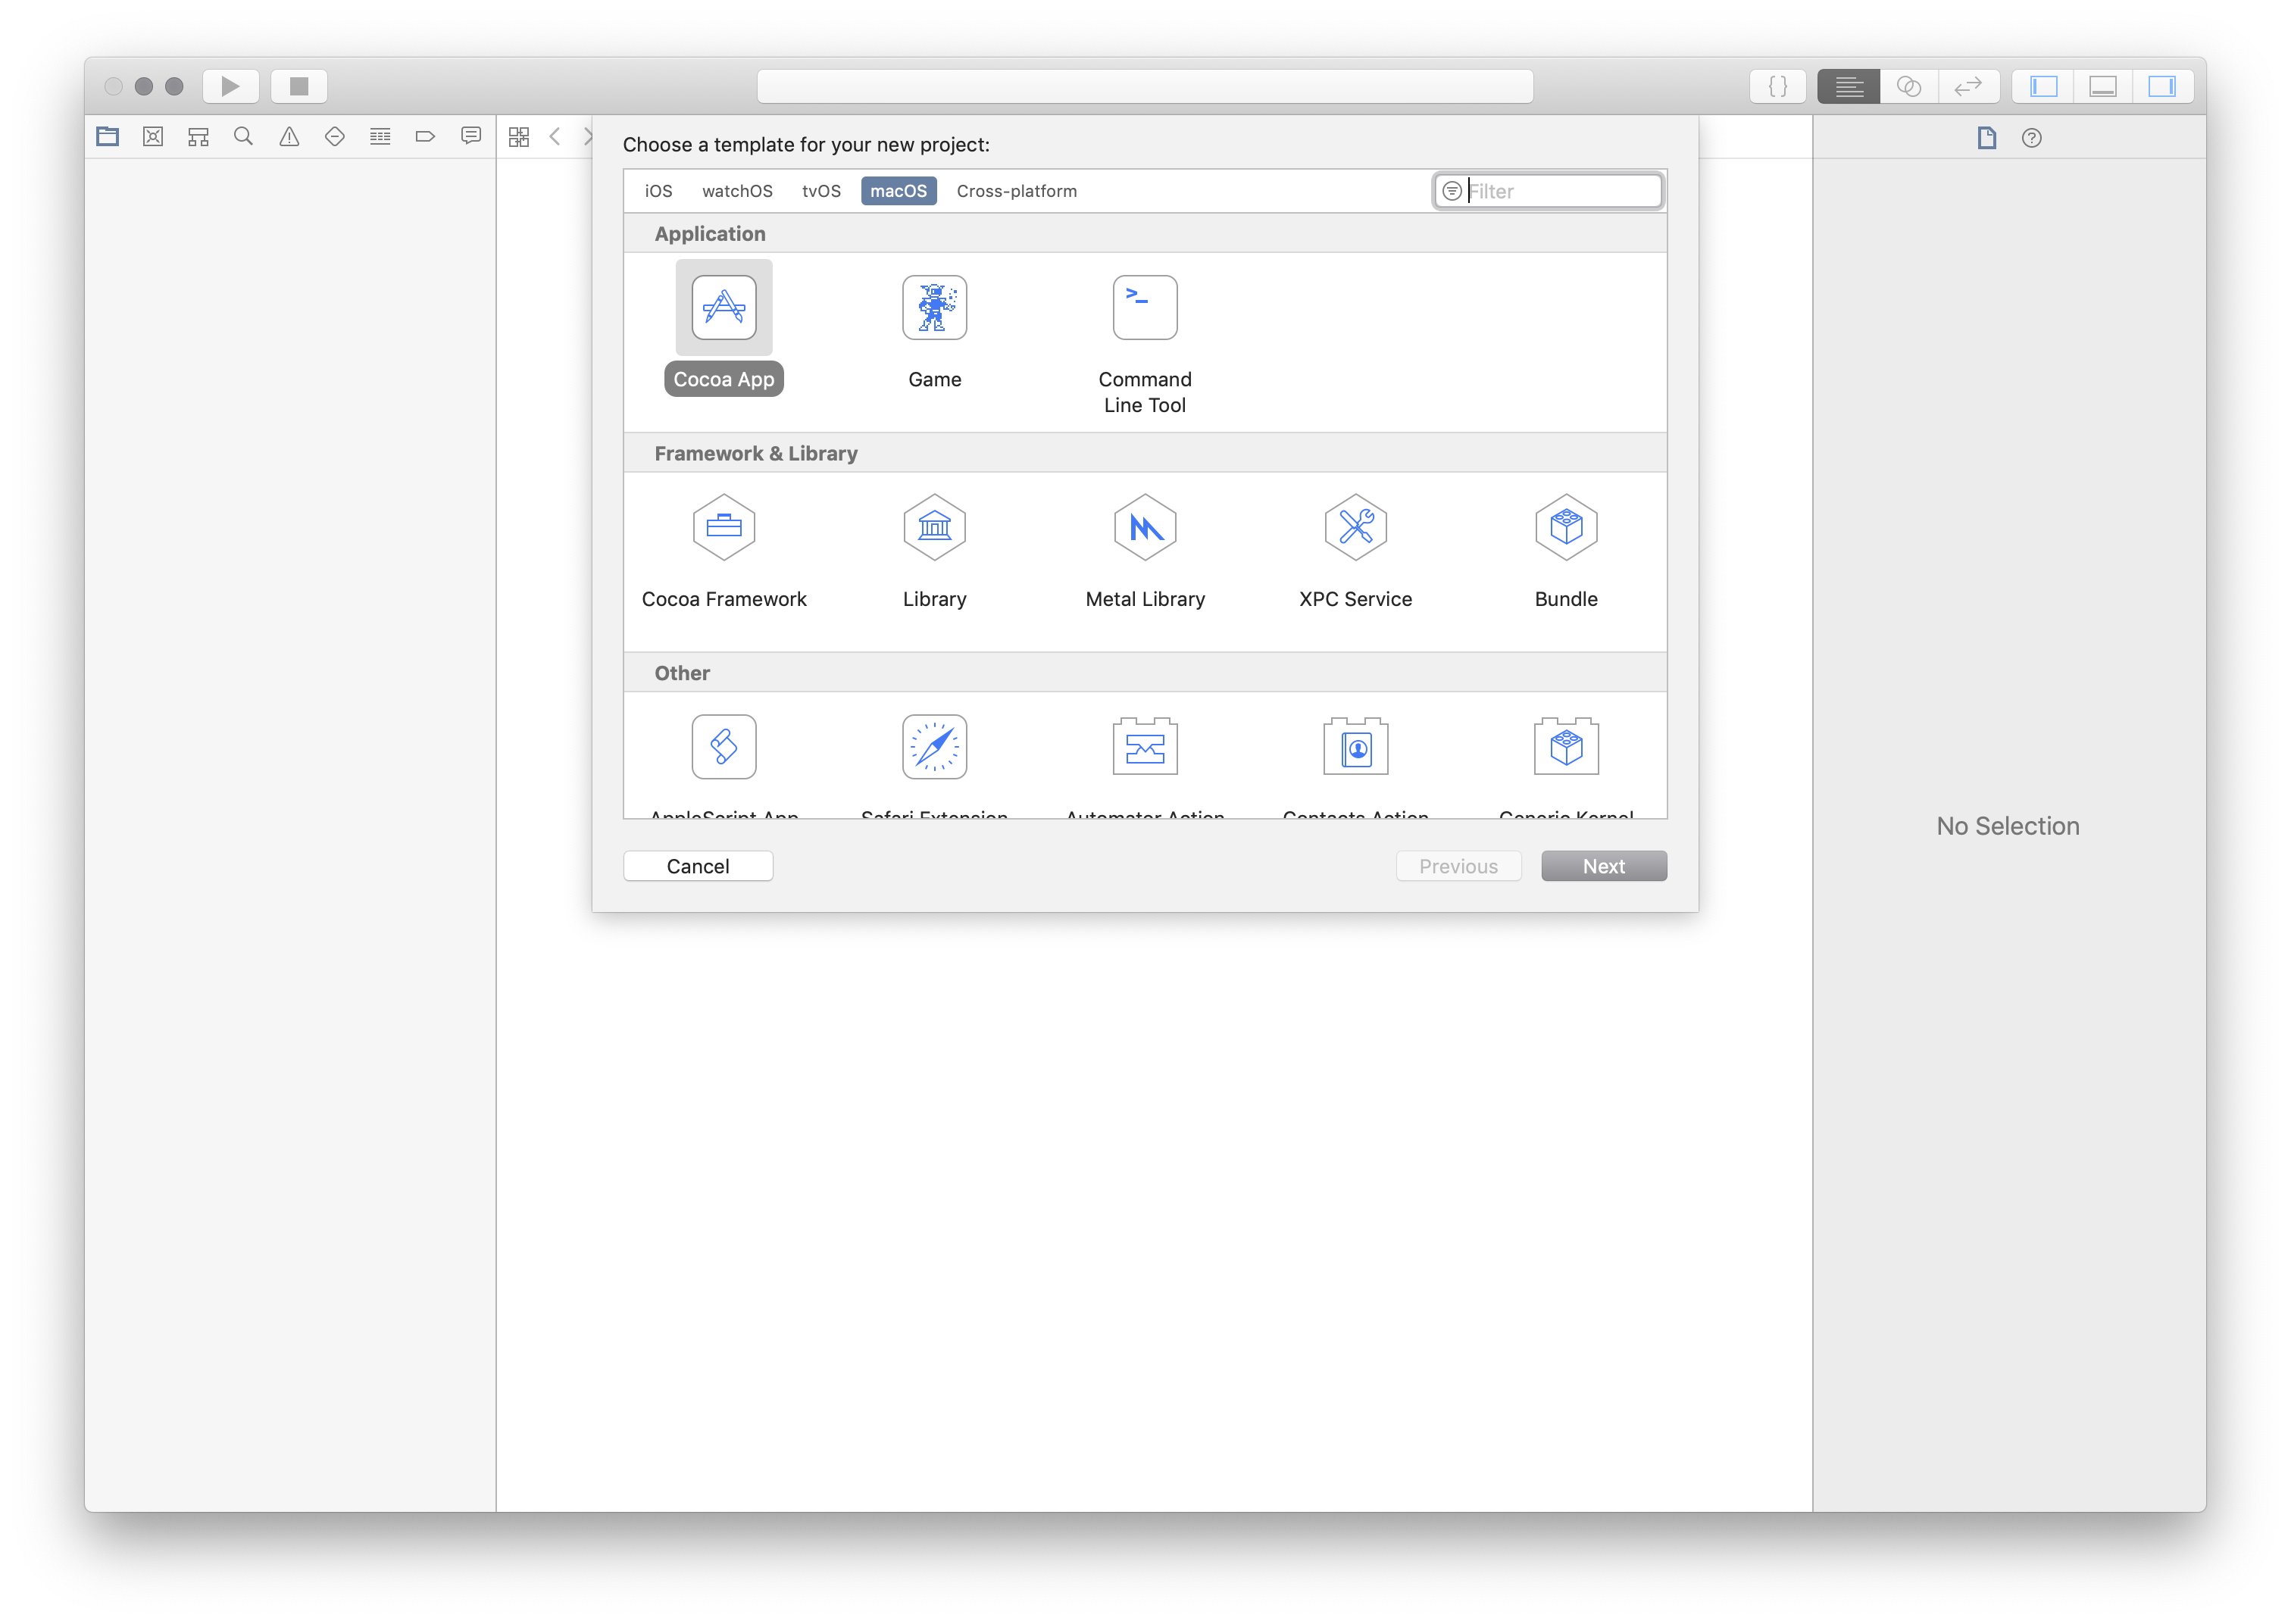
Step 1. Create a project and name it
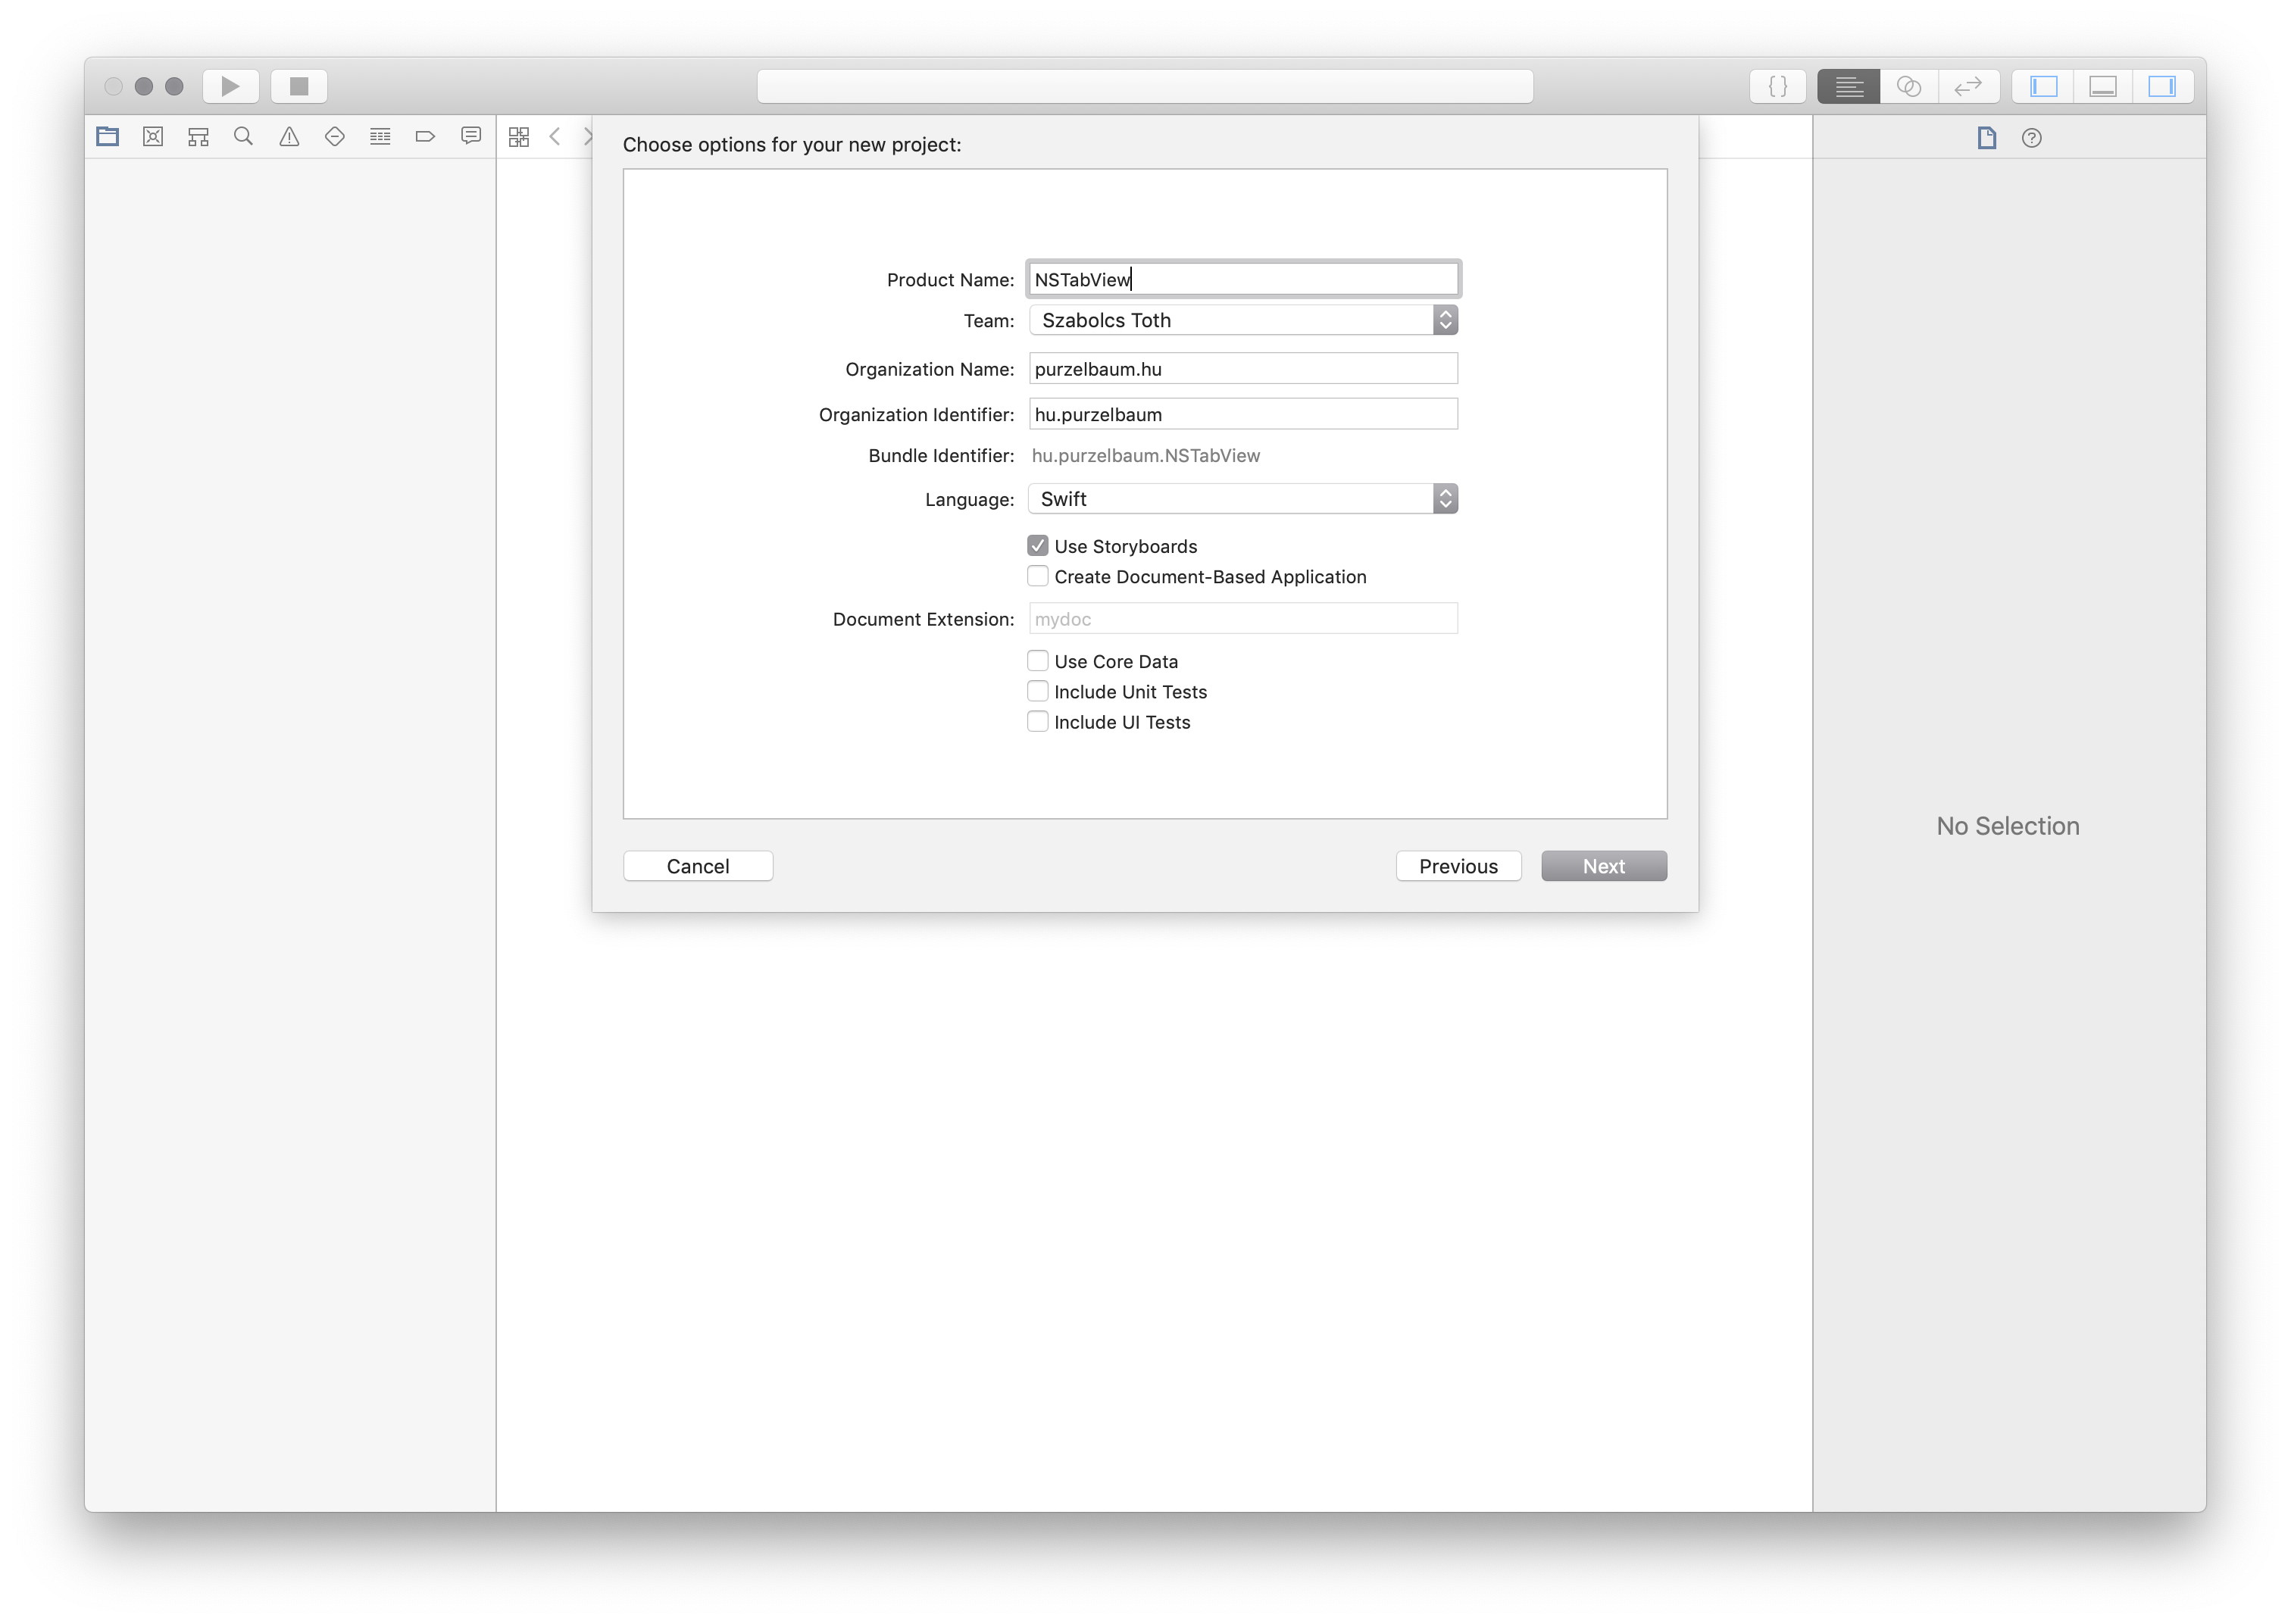
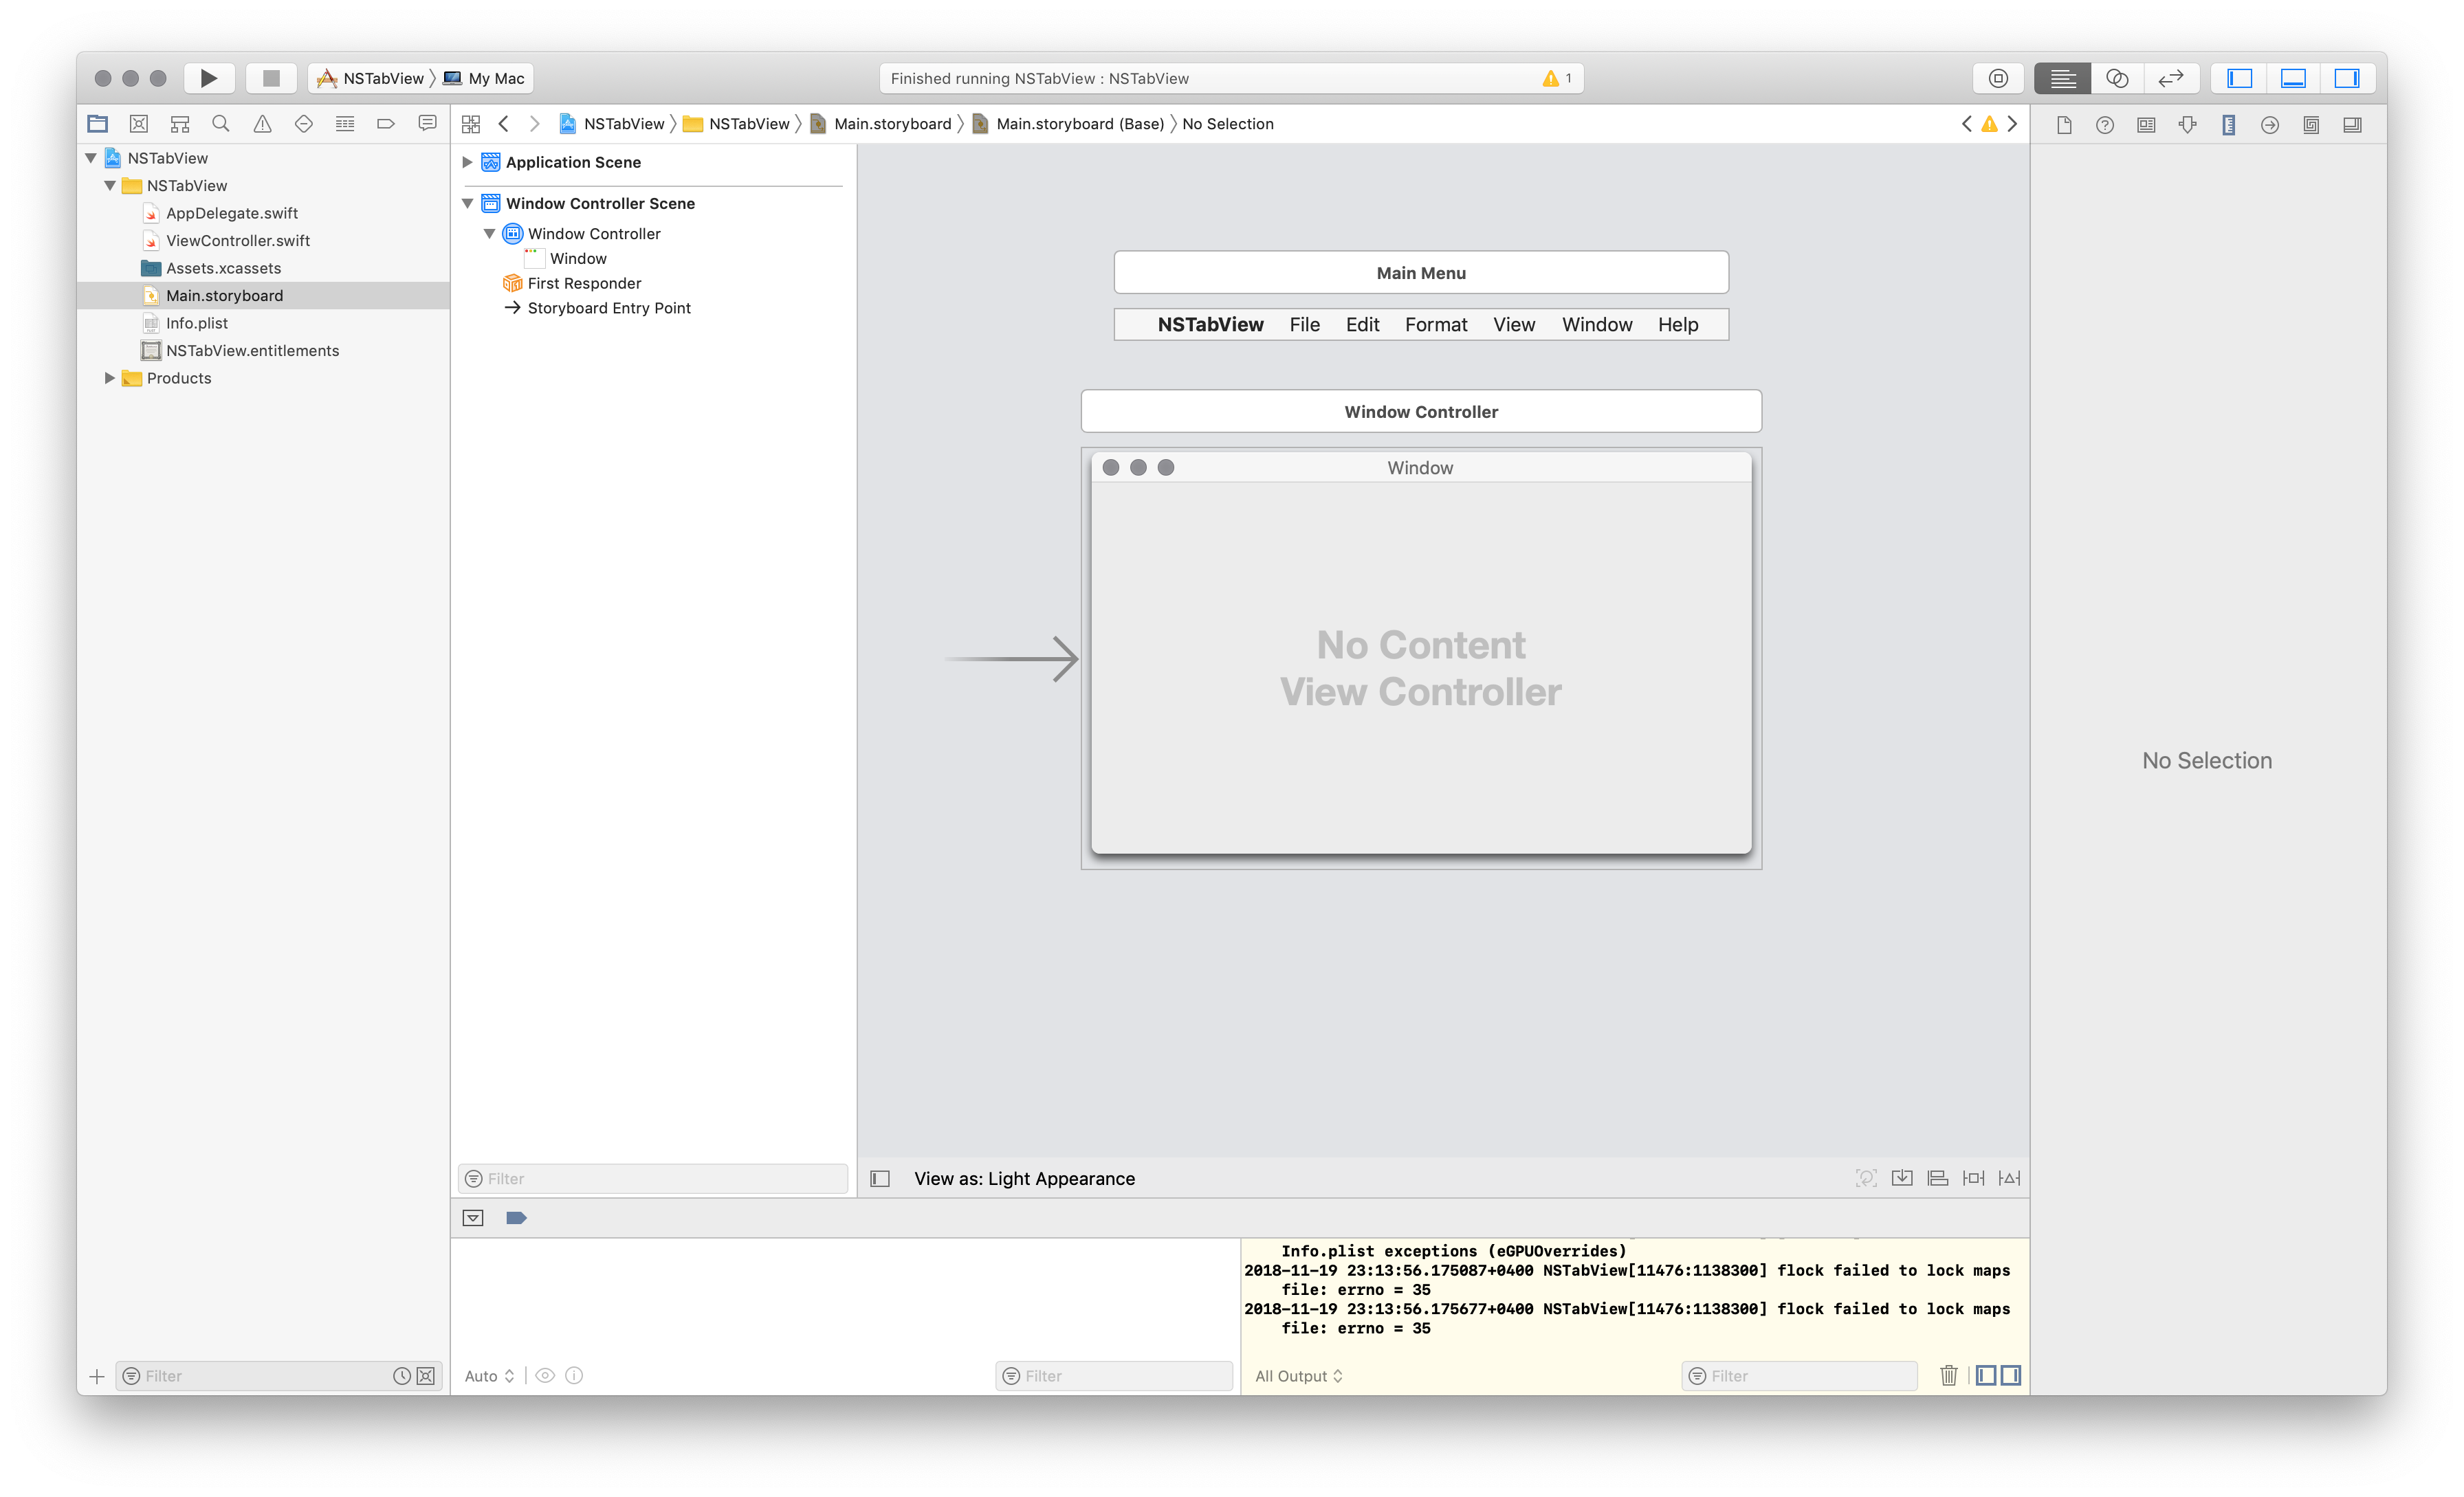
Step 2. Delete View Controller
Step 3. Add NSToolbar but remove all items
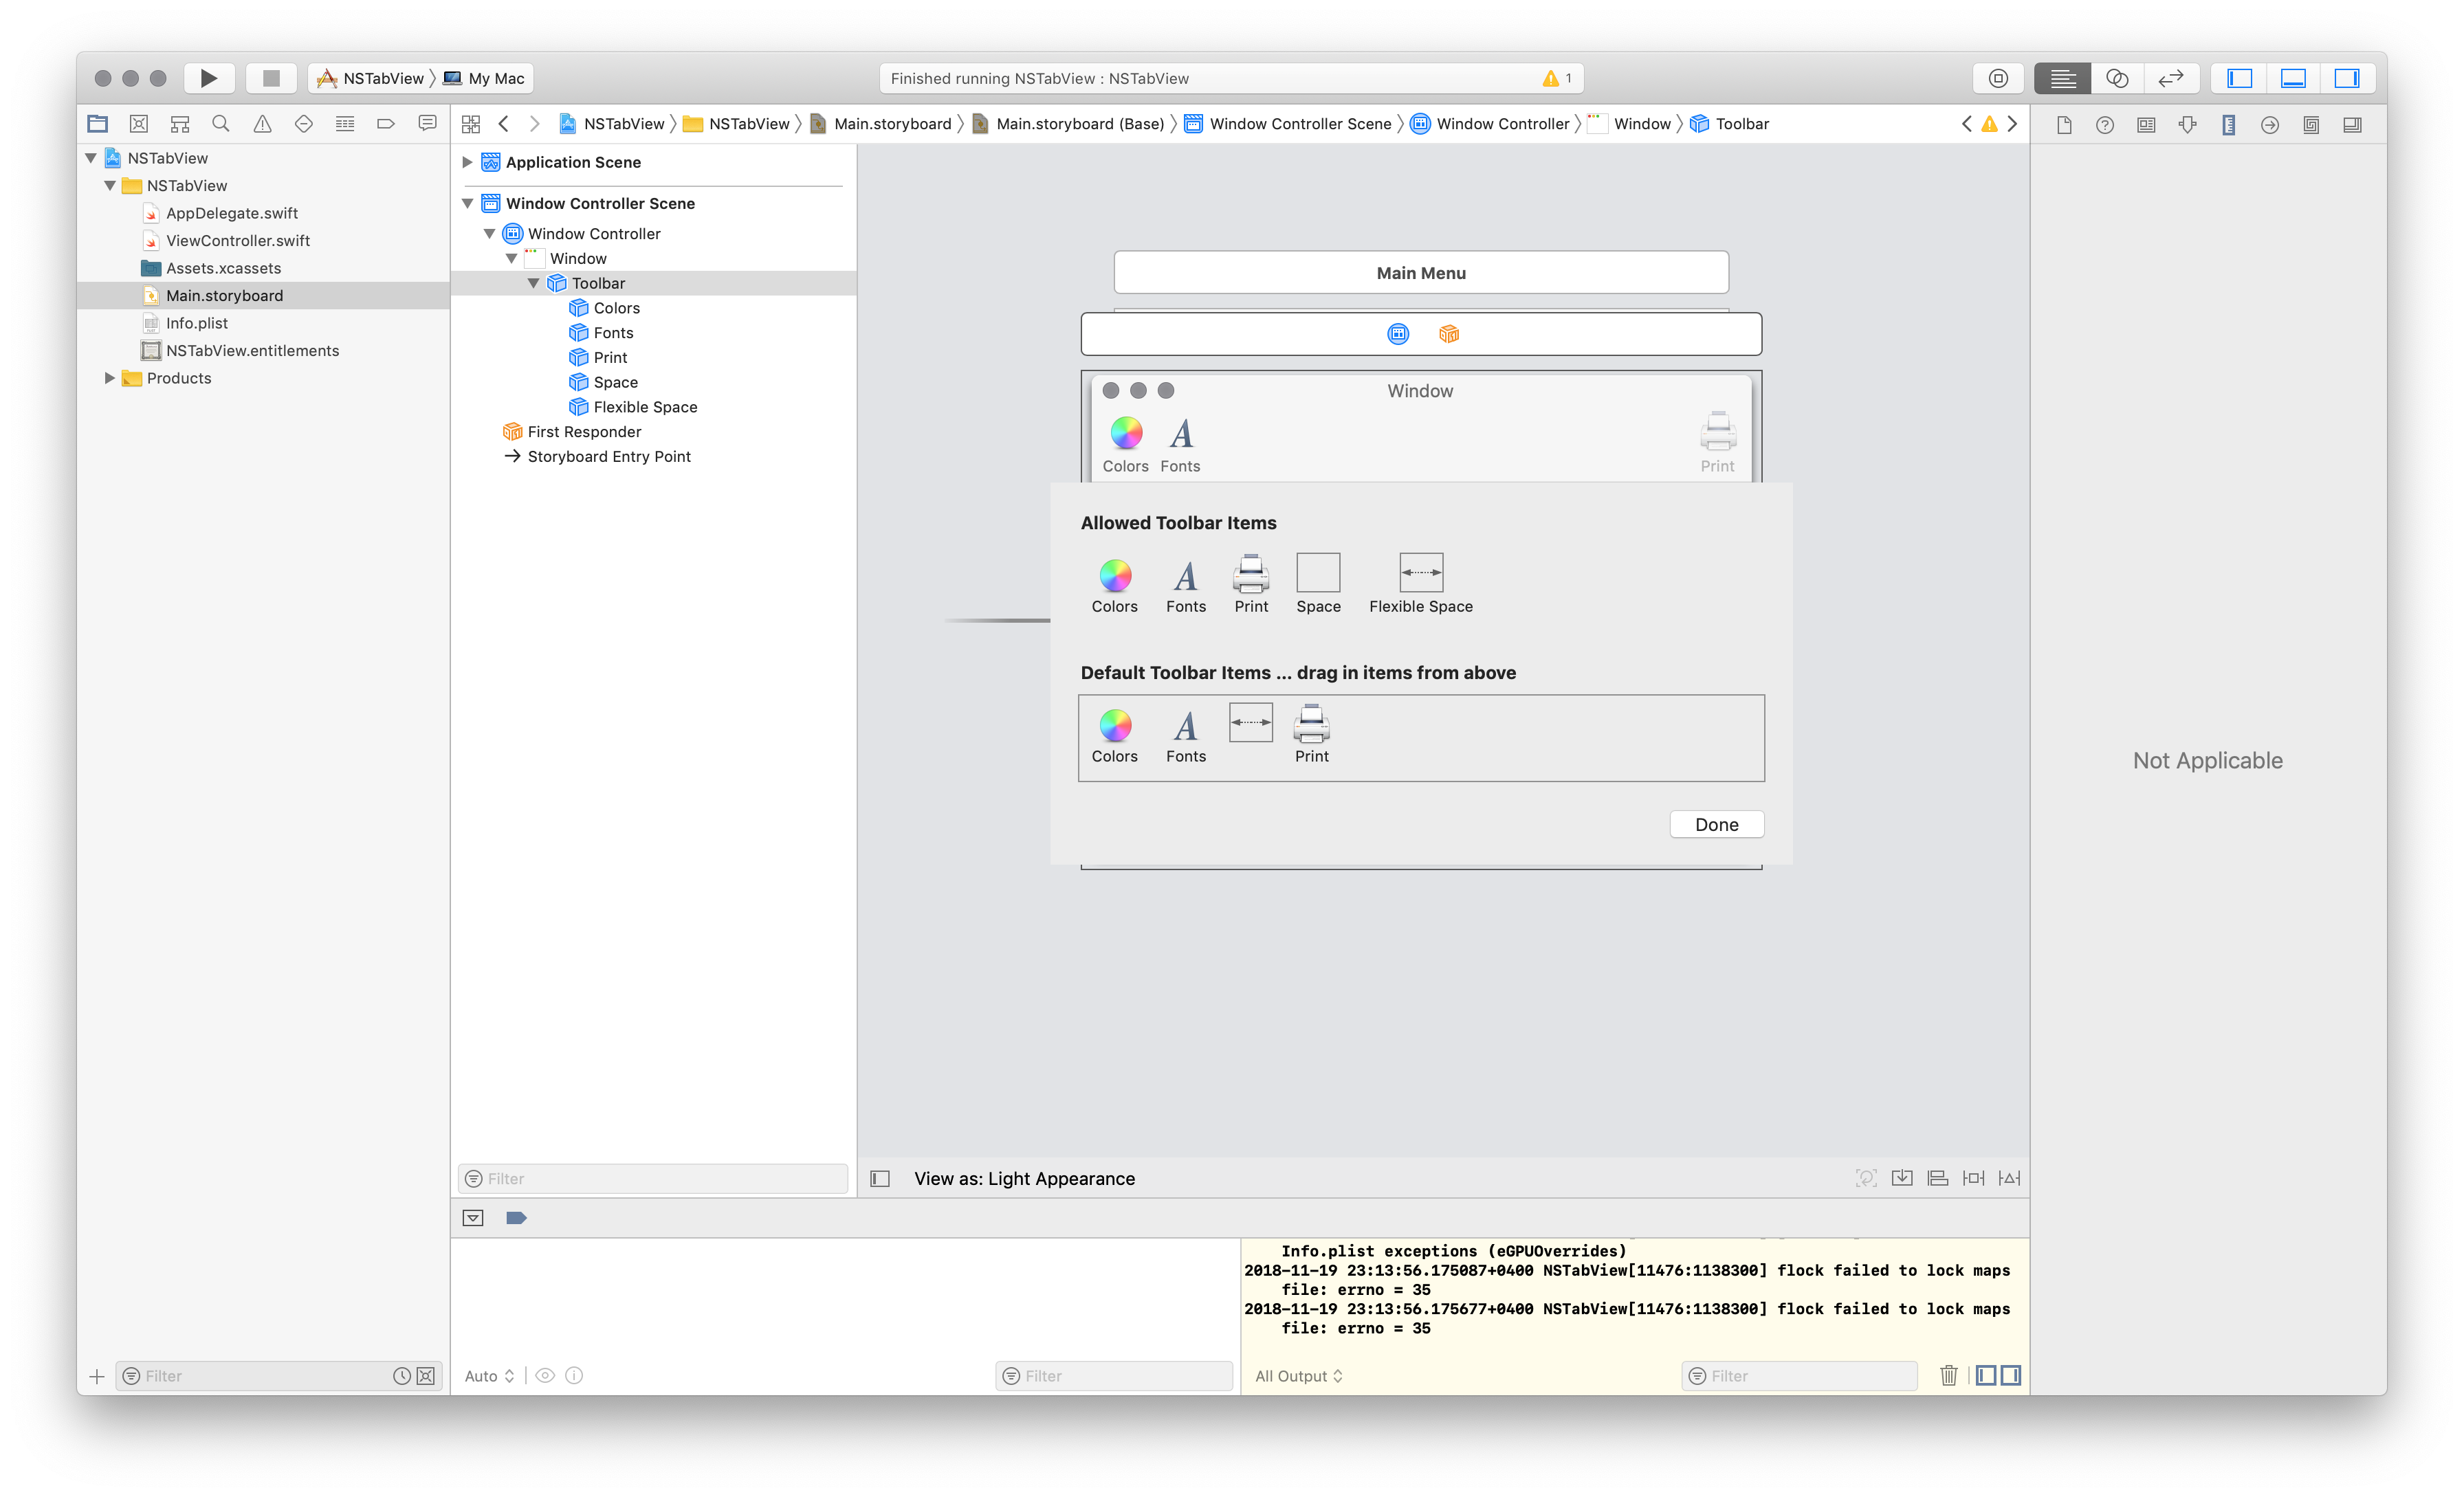
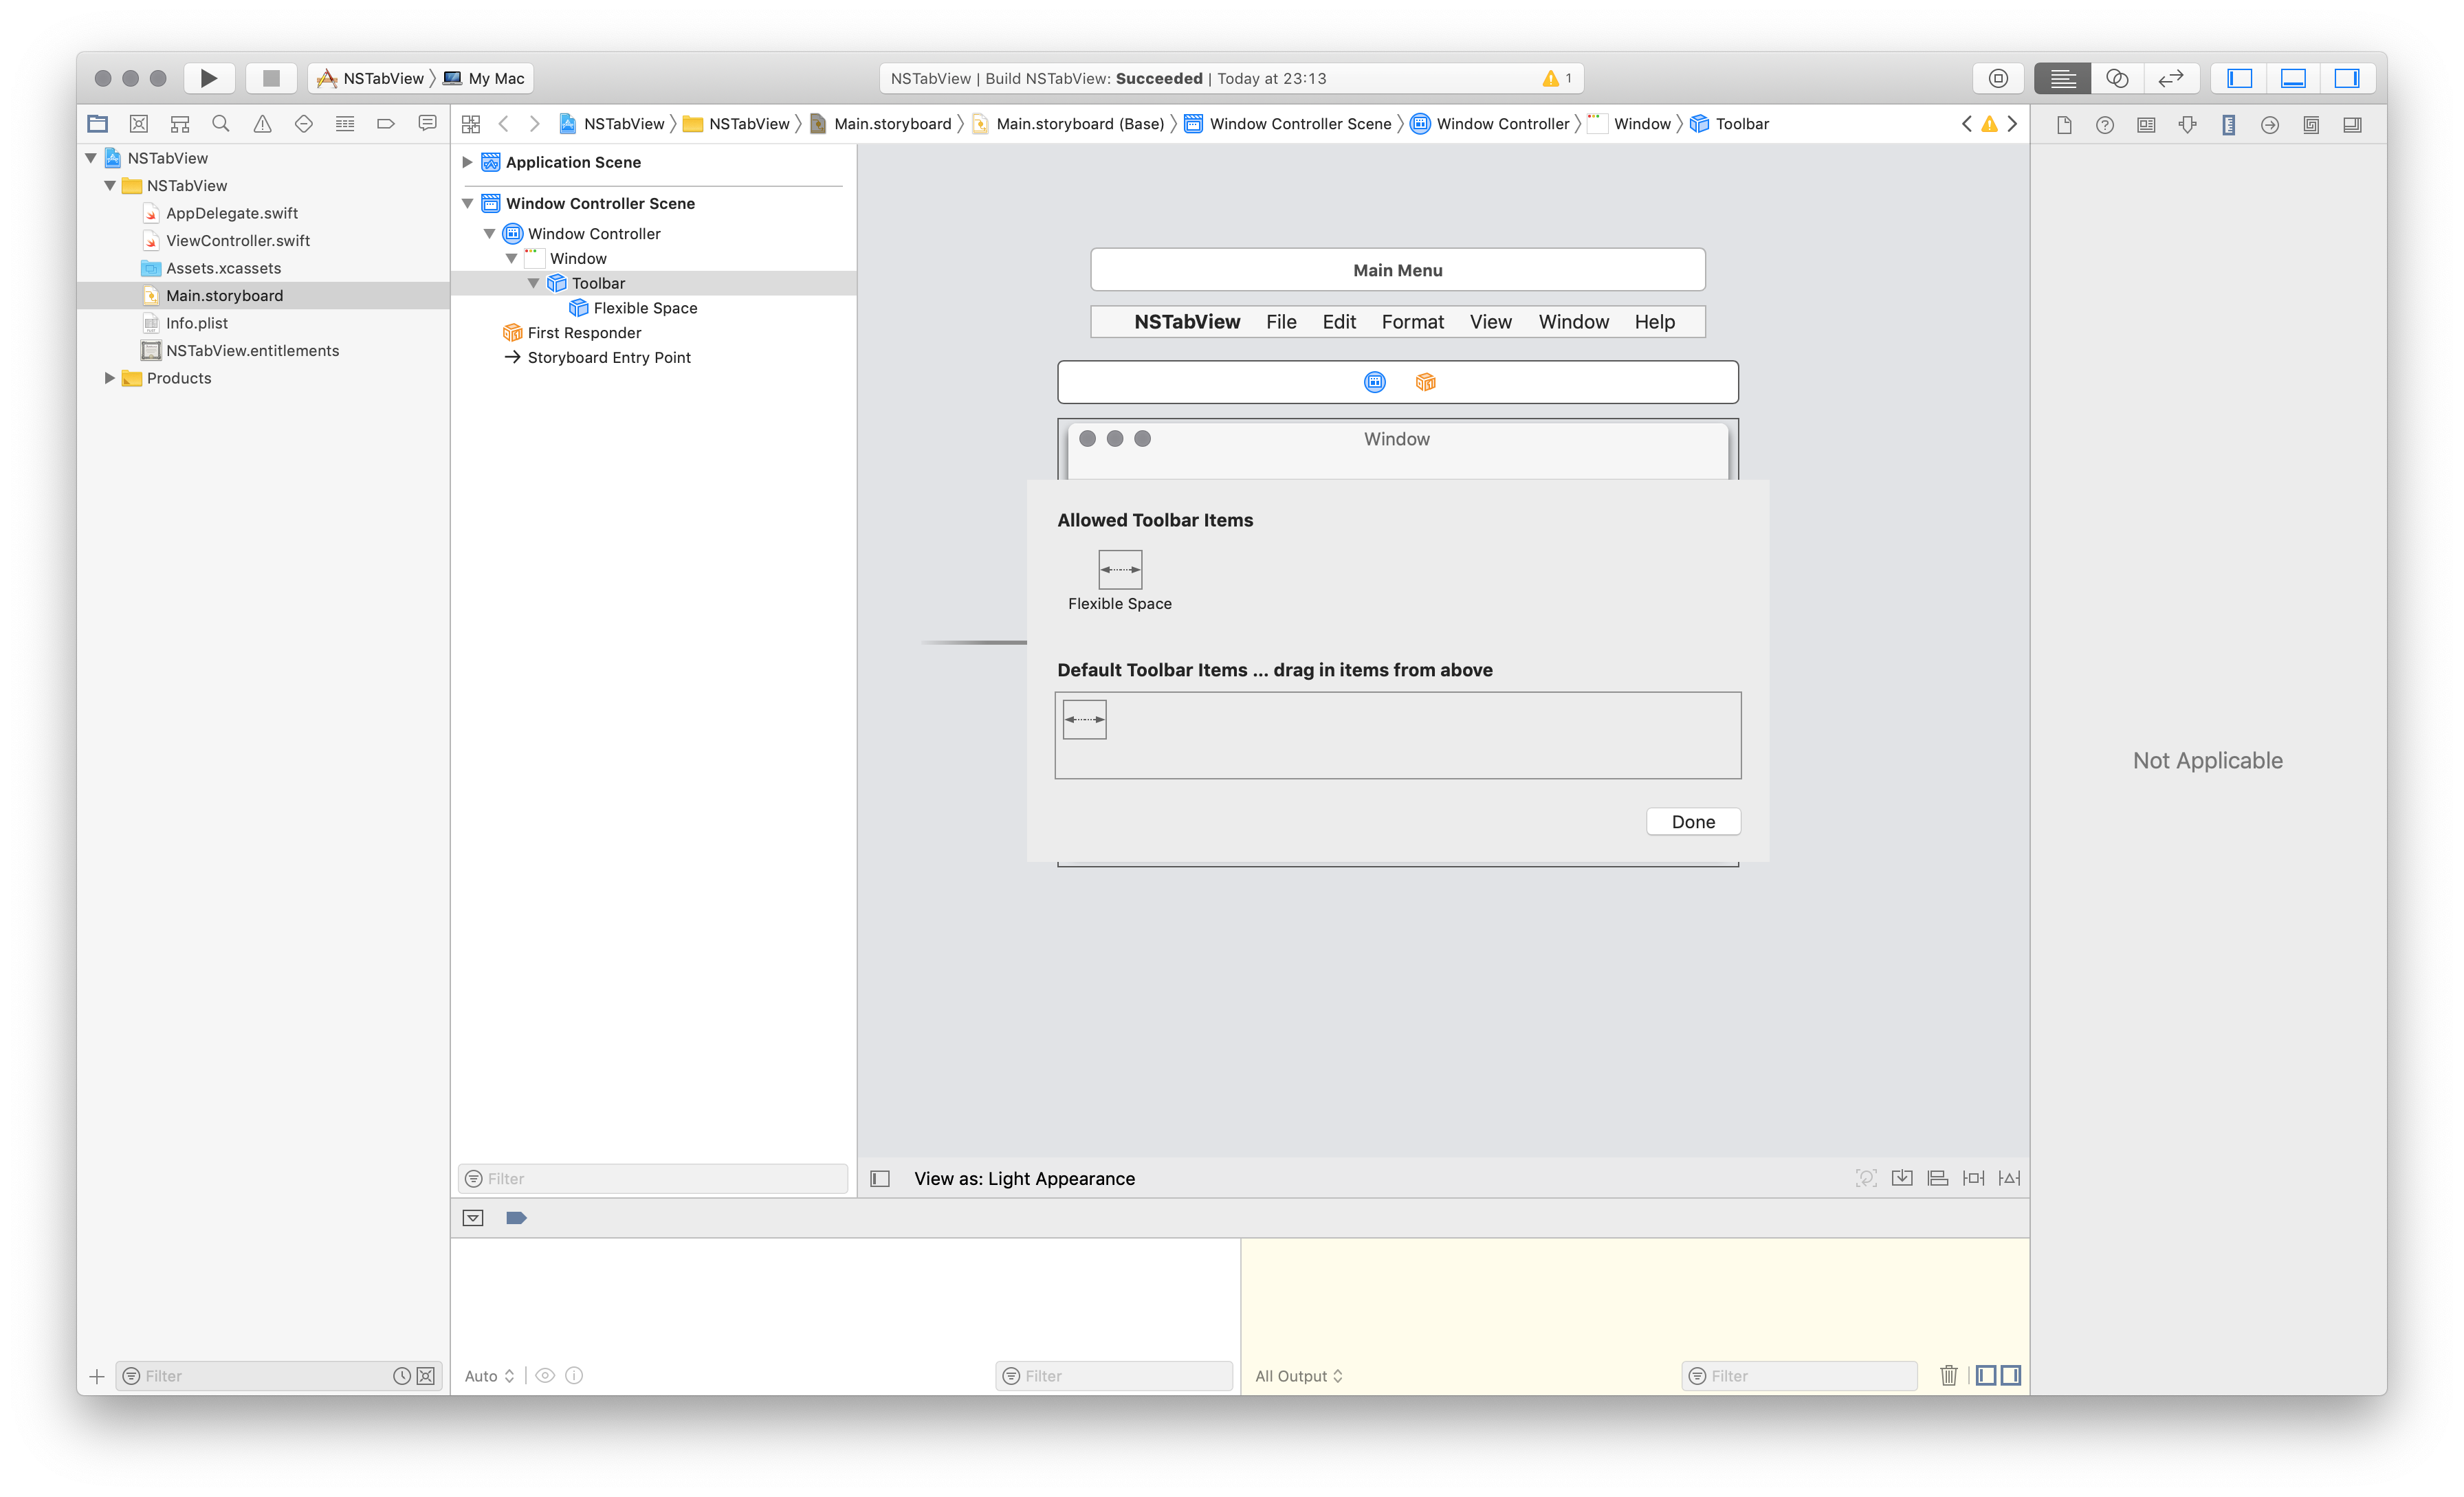
Step 4. Add NSSegmentedControl and decrease the number of segments to 2
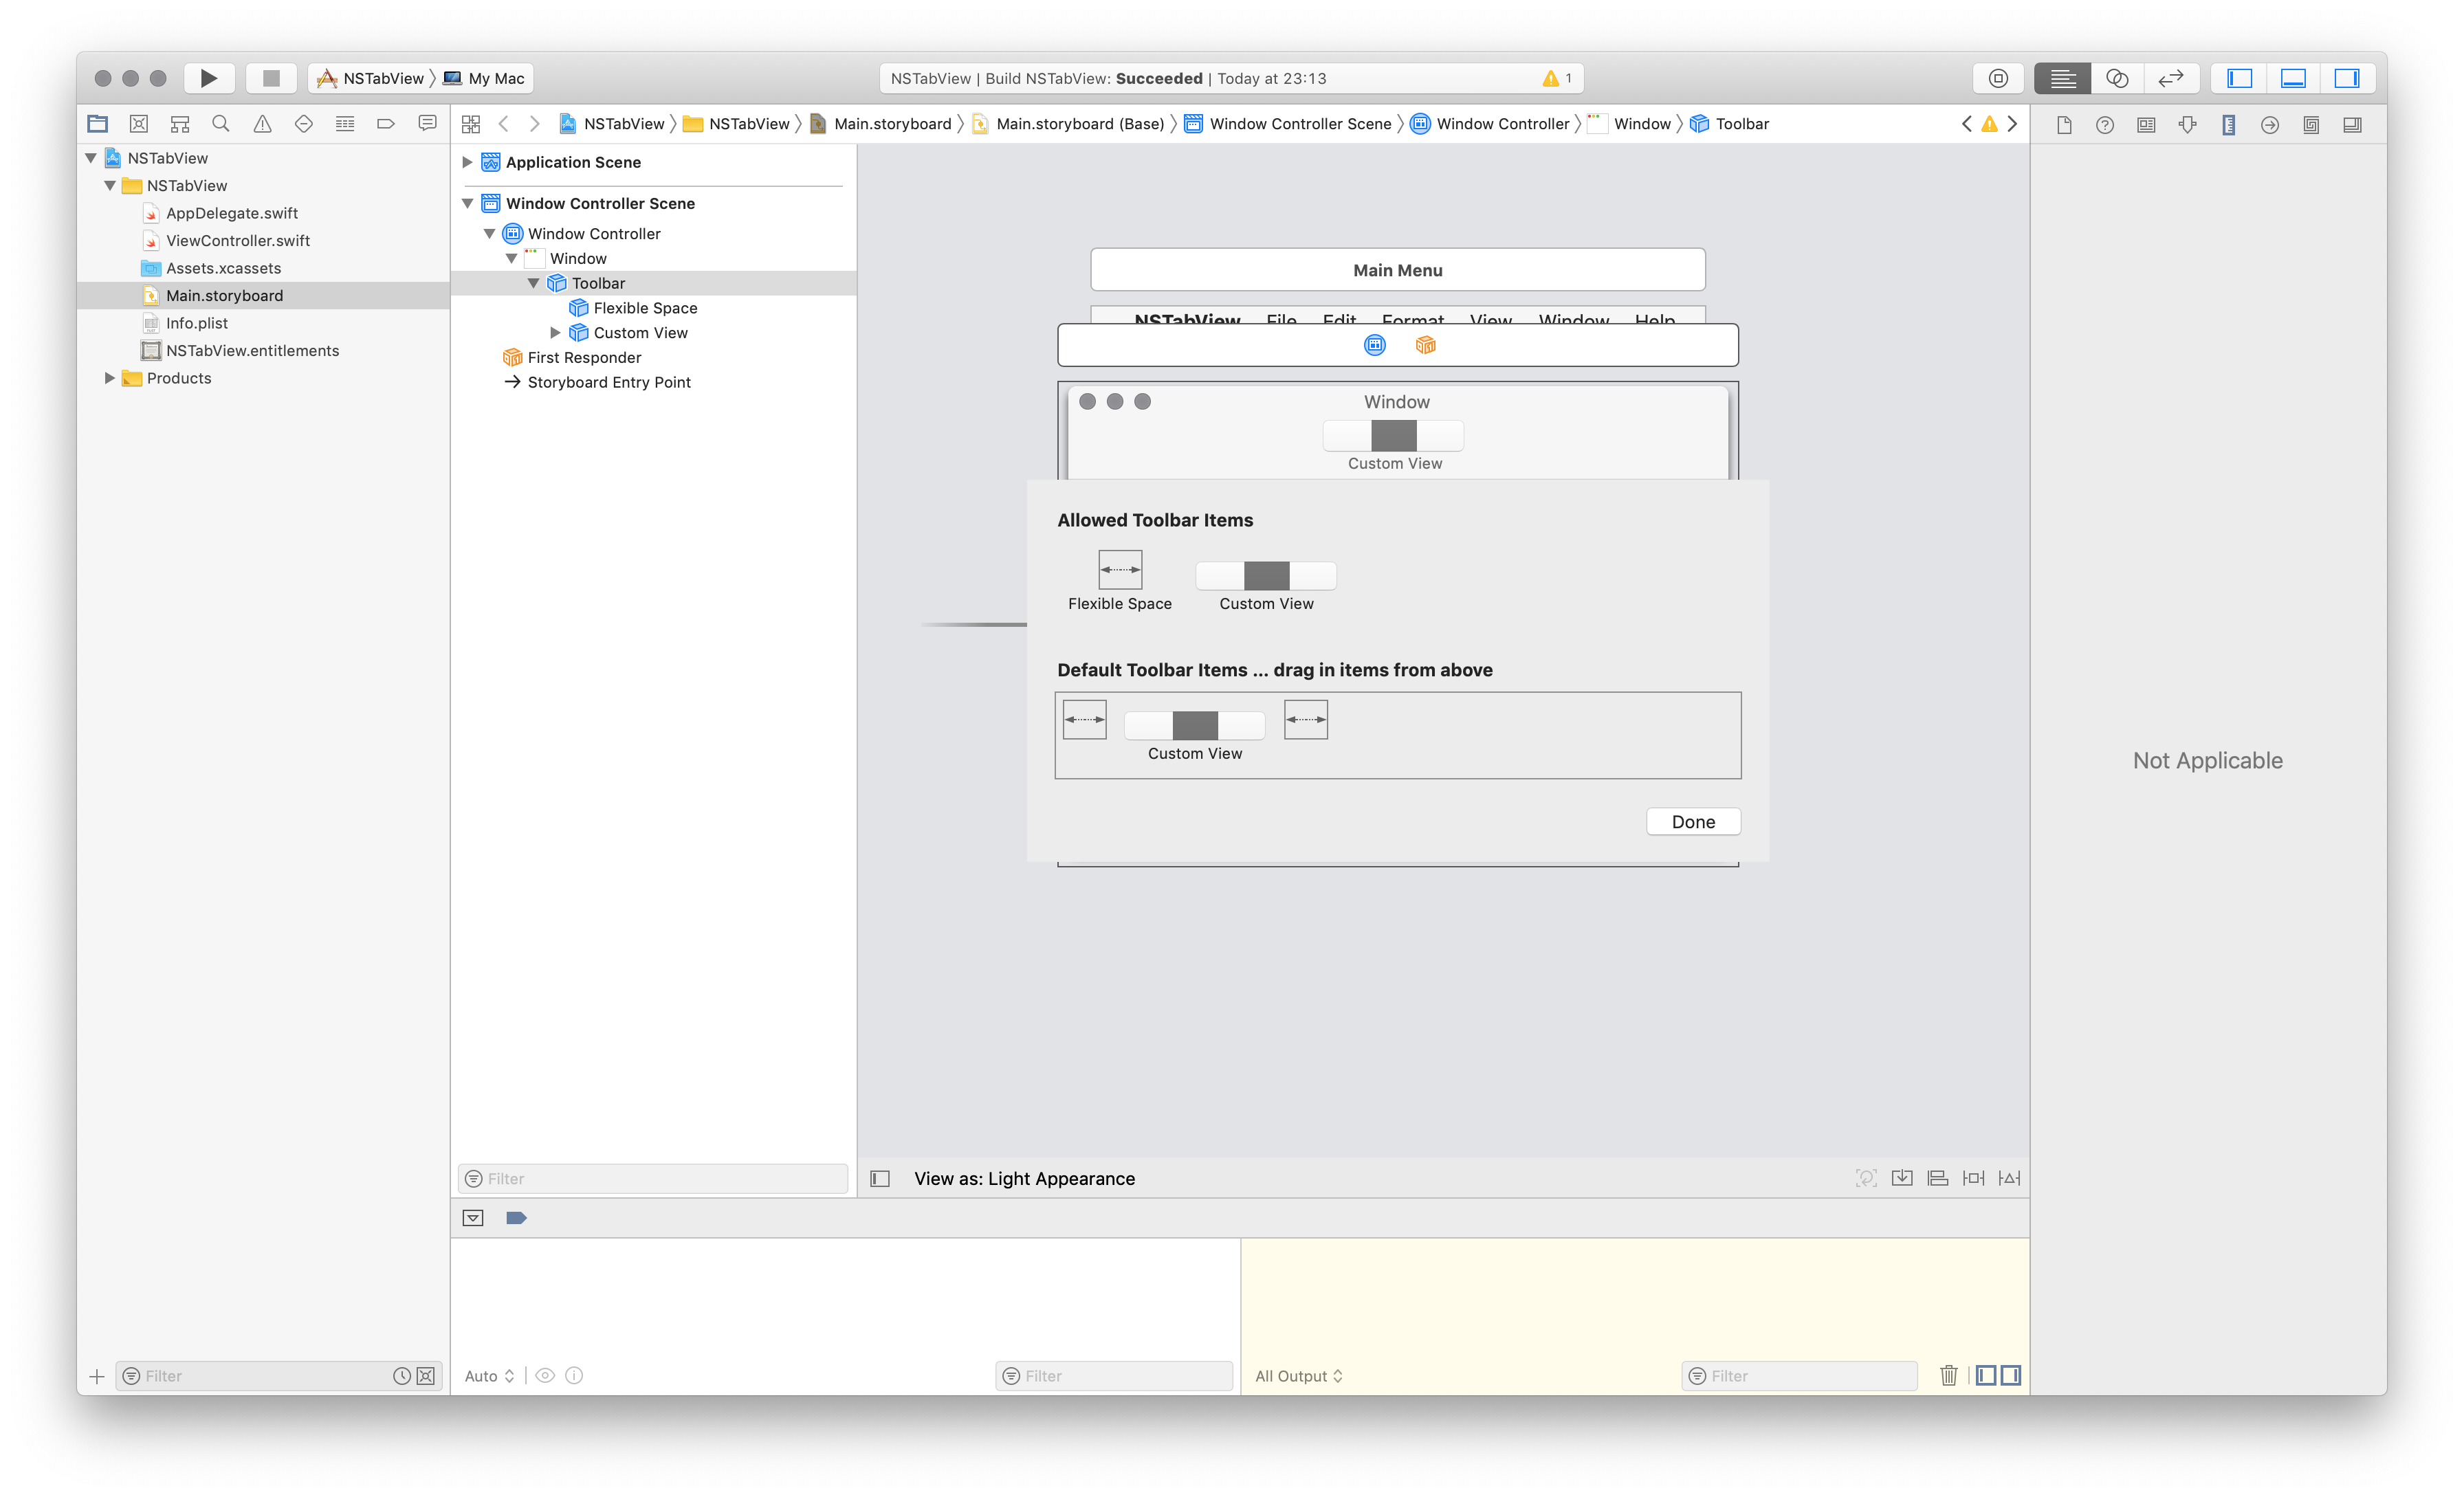
Setting the “Segment 0” to “Selected”, make the first “tab” or “segment” active.
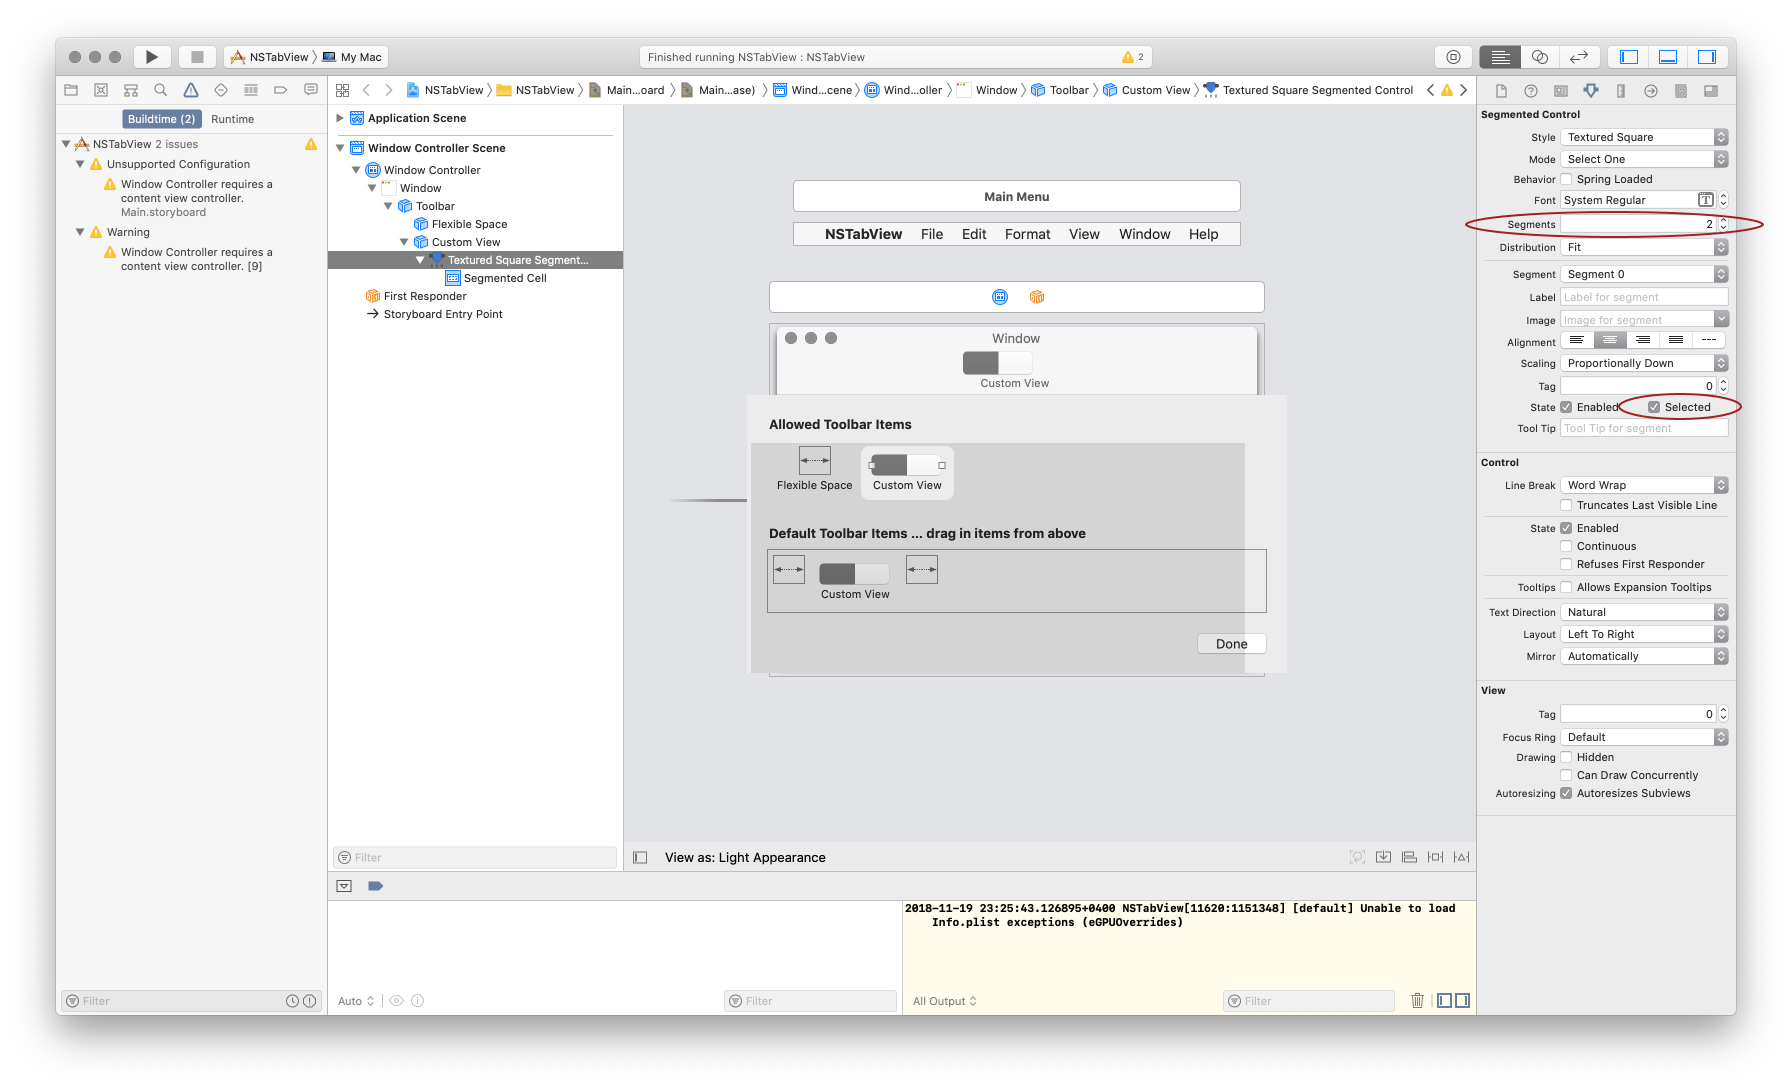
Step 5. Add TabView Controller
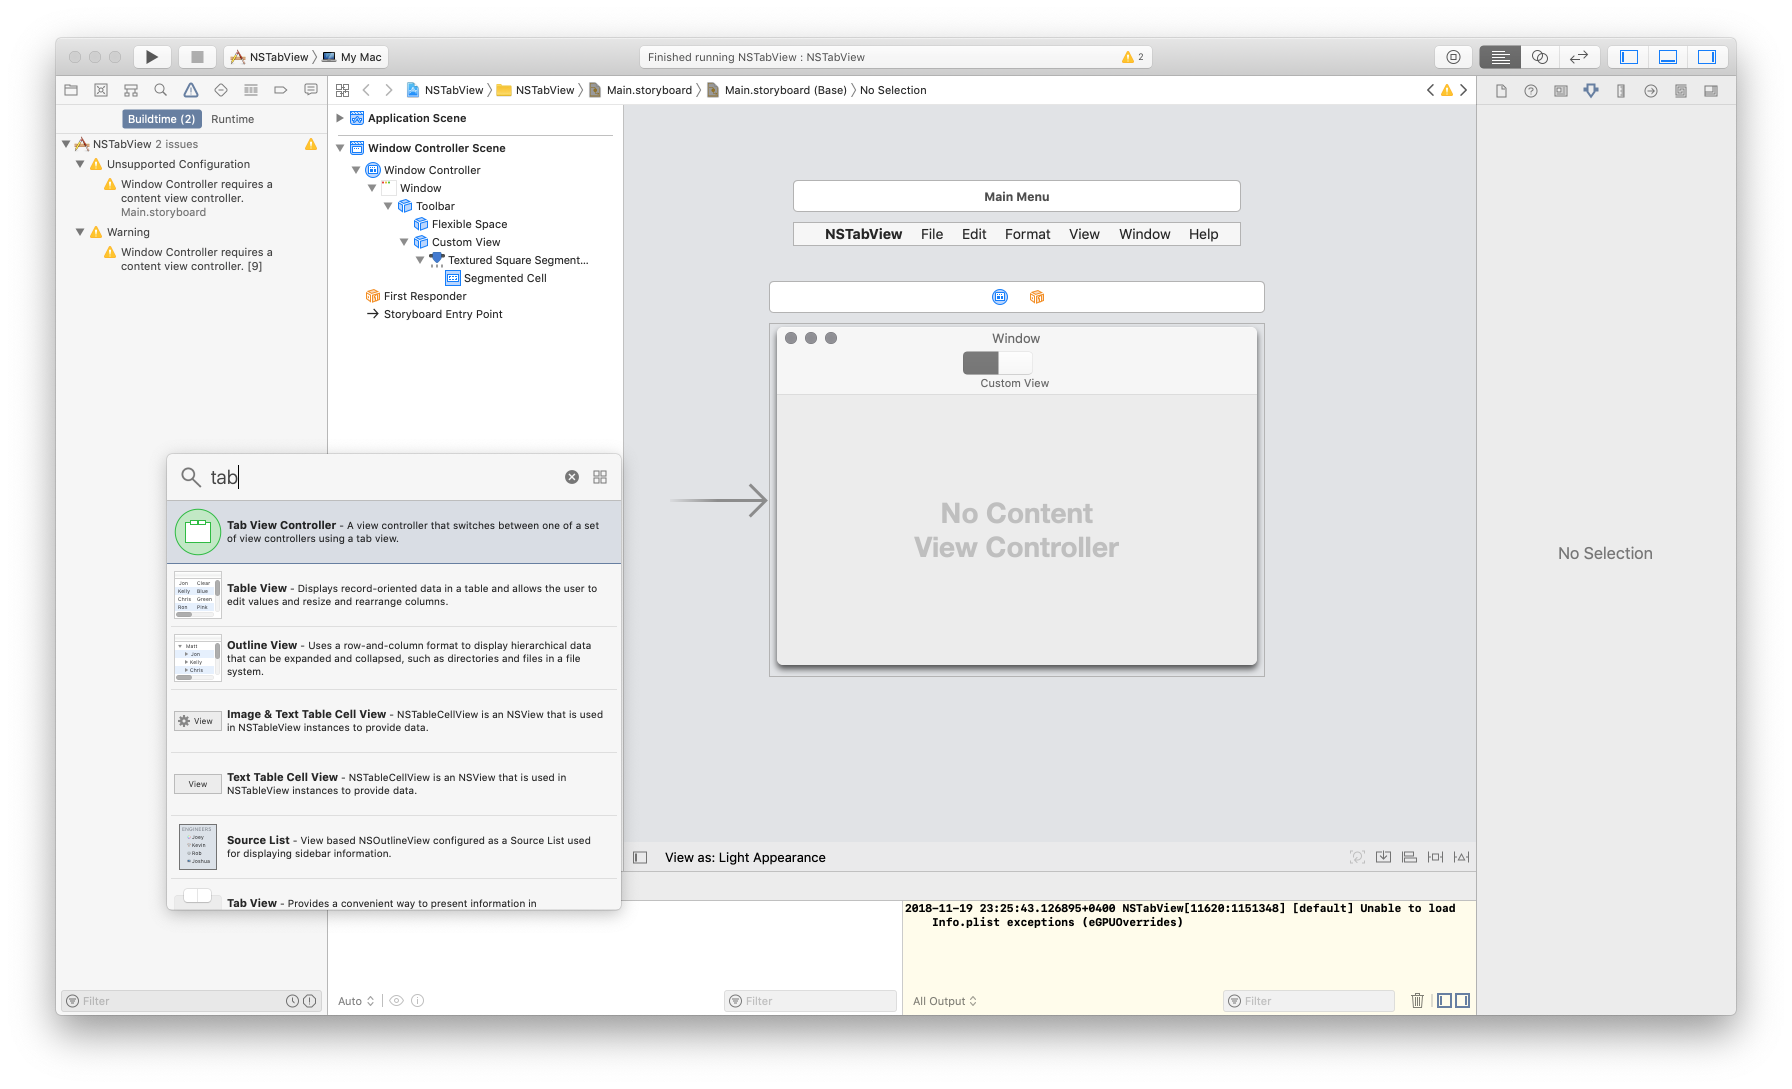
Step 6. Add TabView Controller to NSWindow as content view
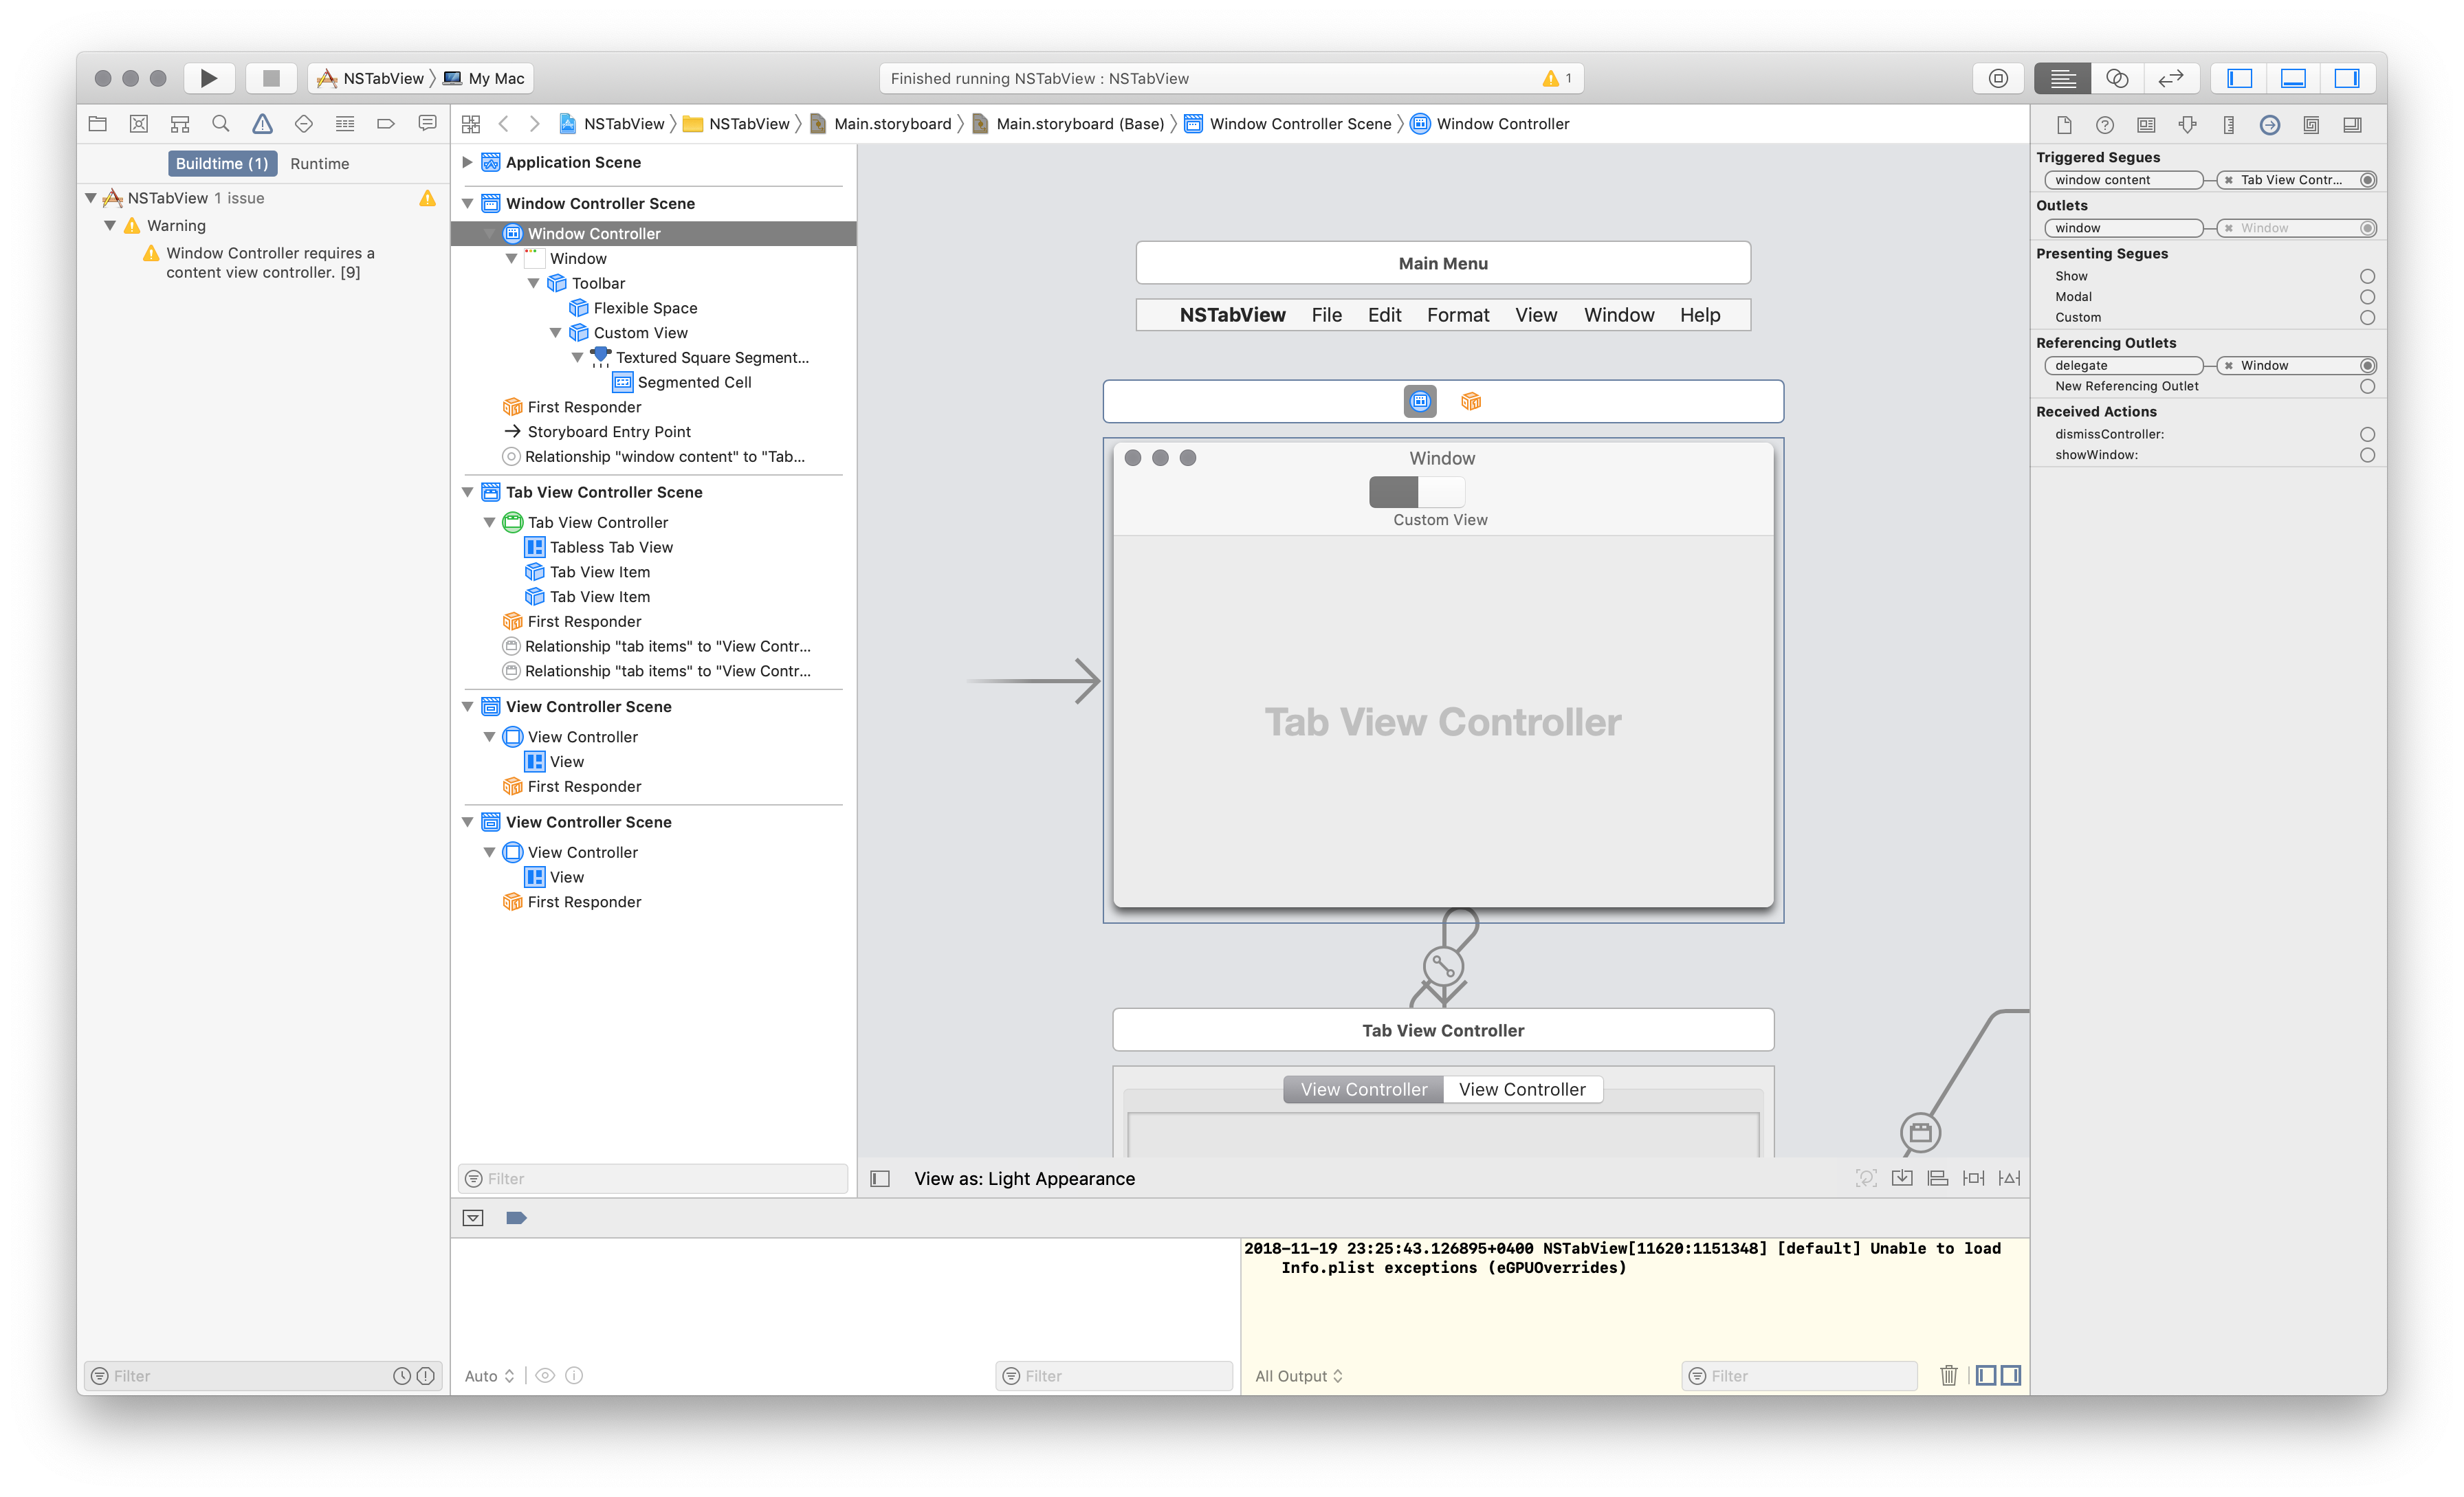
Step 7. Add two images to the views to check if they work properly
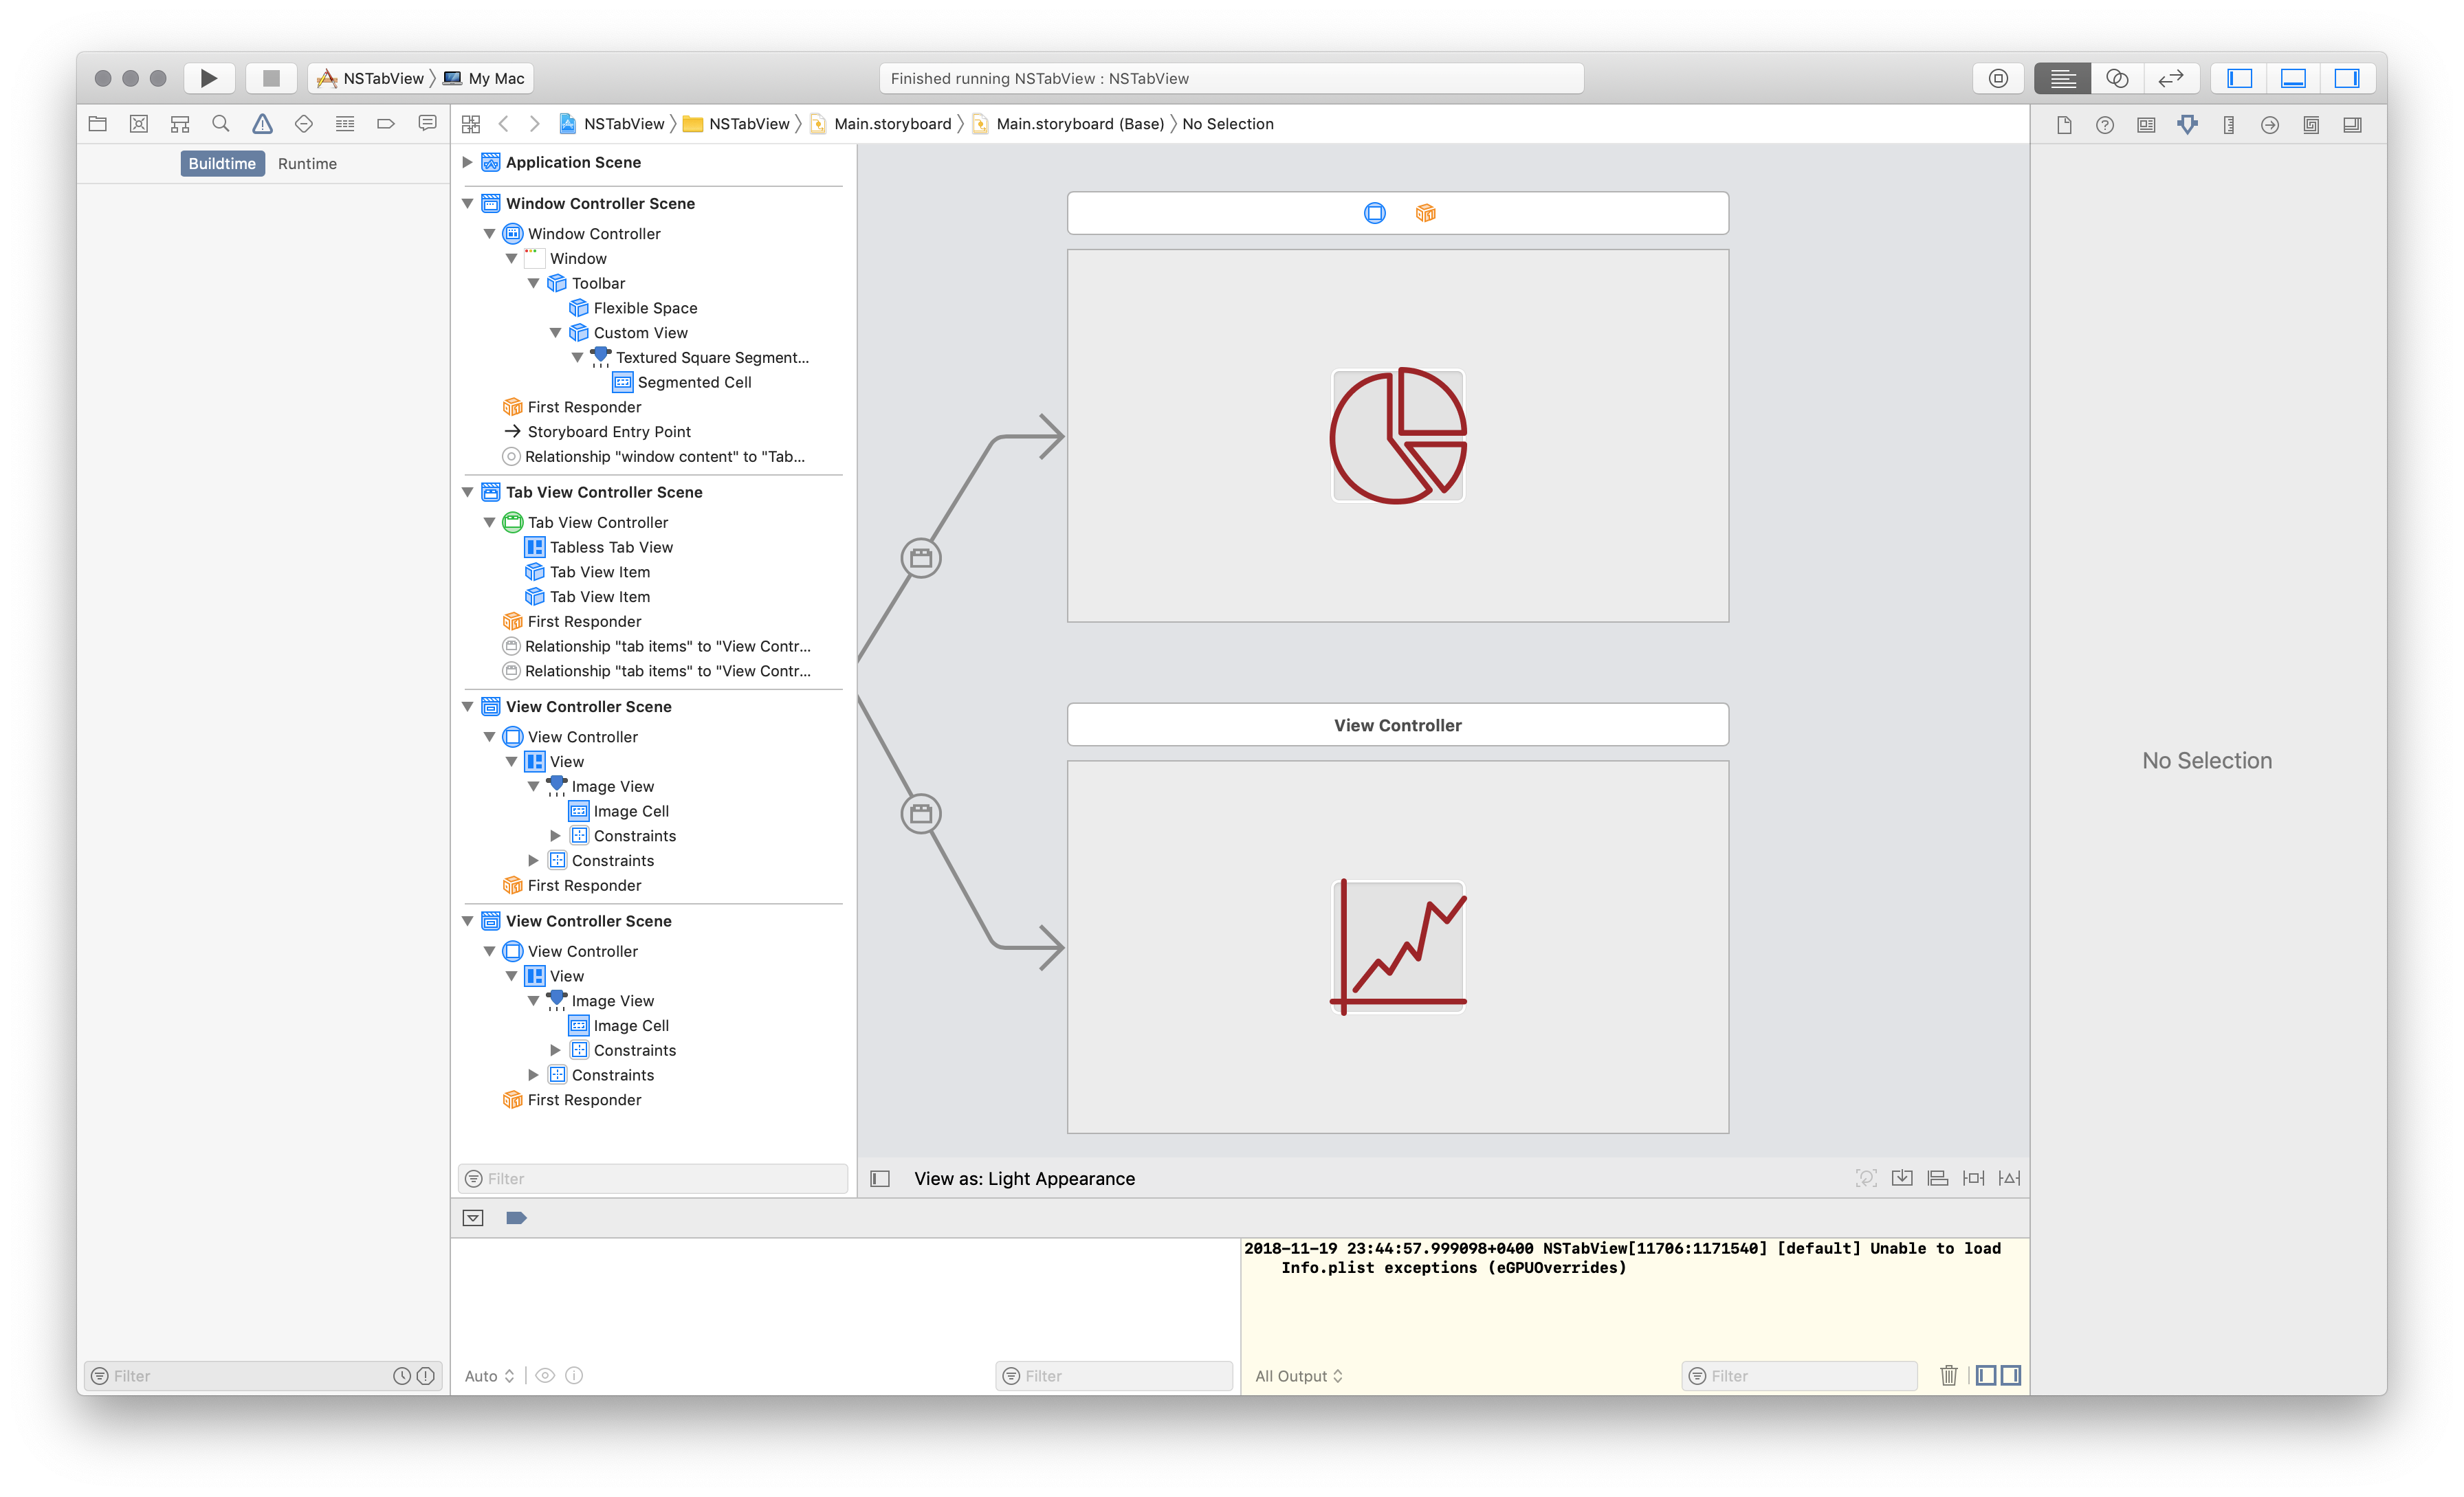
Step 8. Add “New file”, an NSWindowController to our project
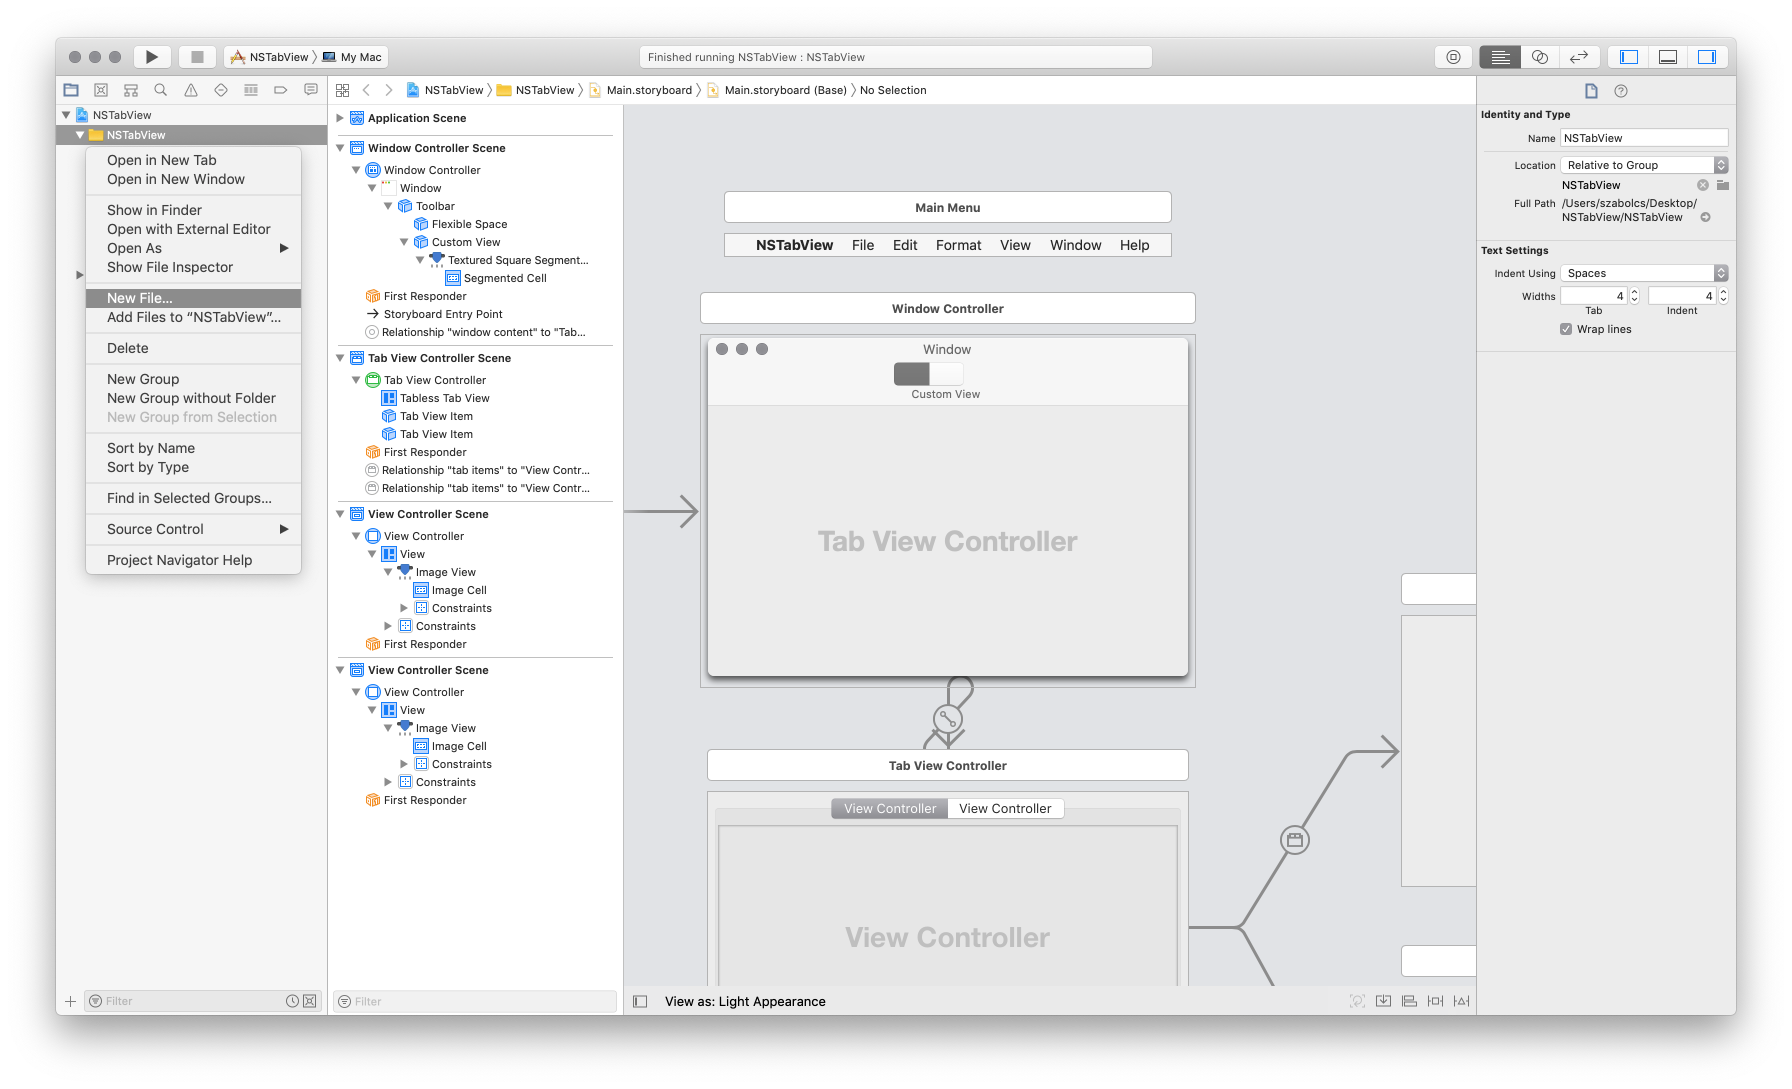
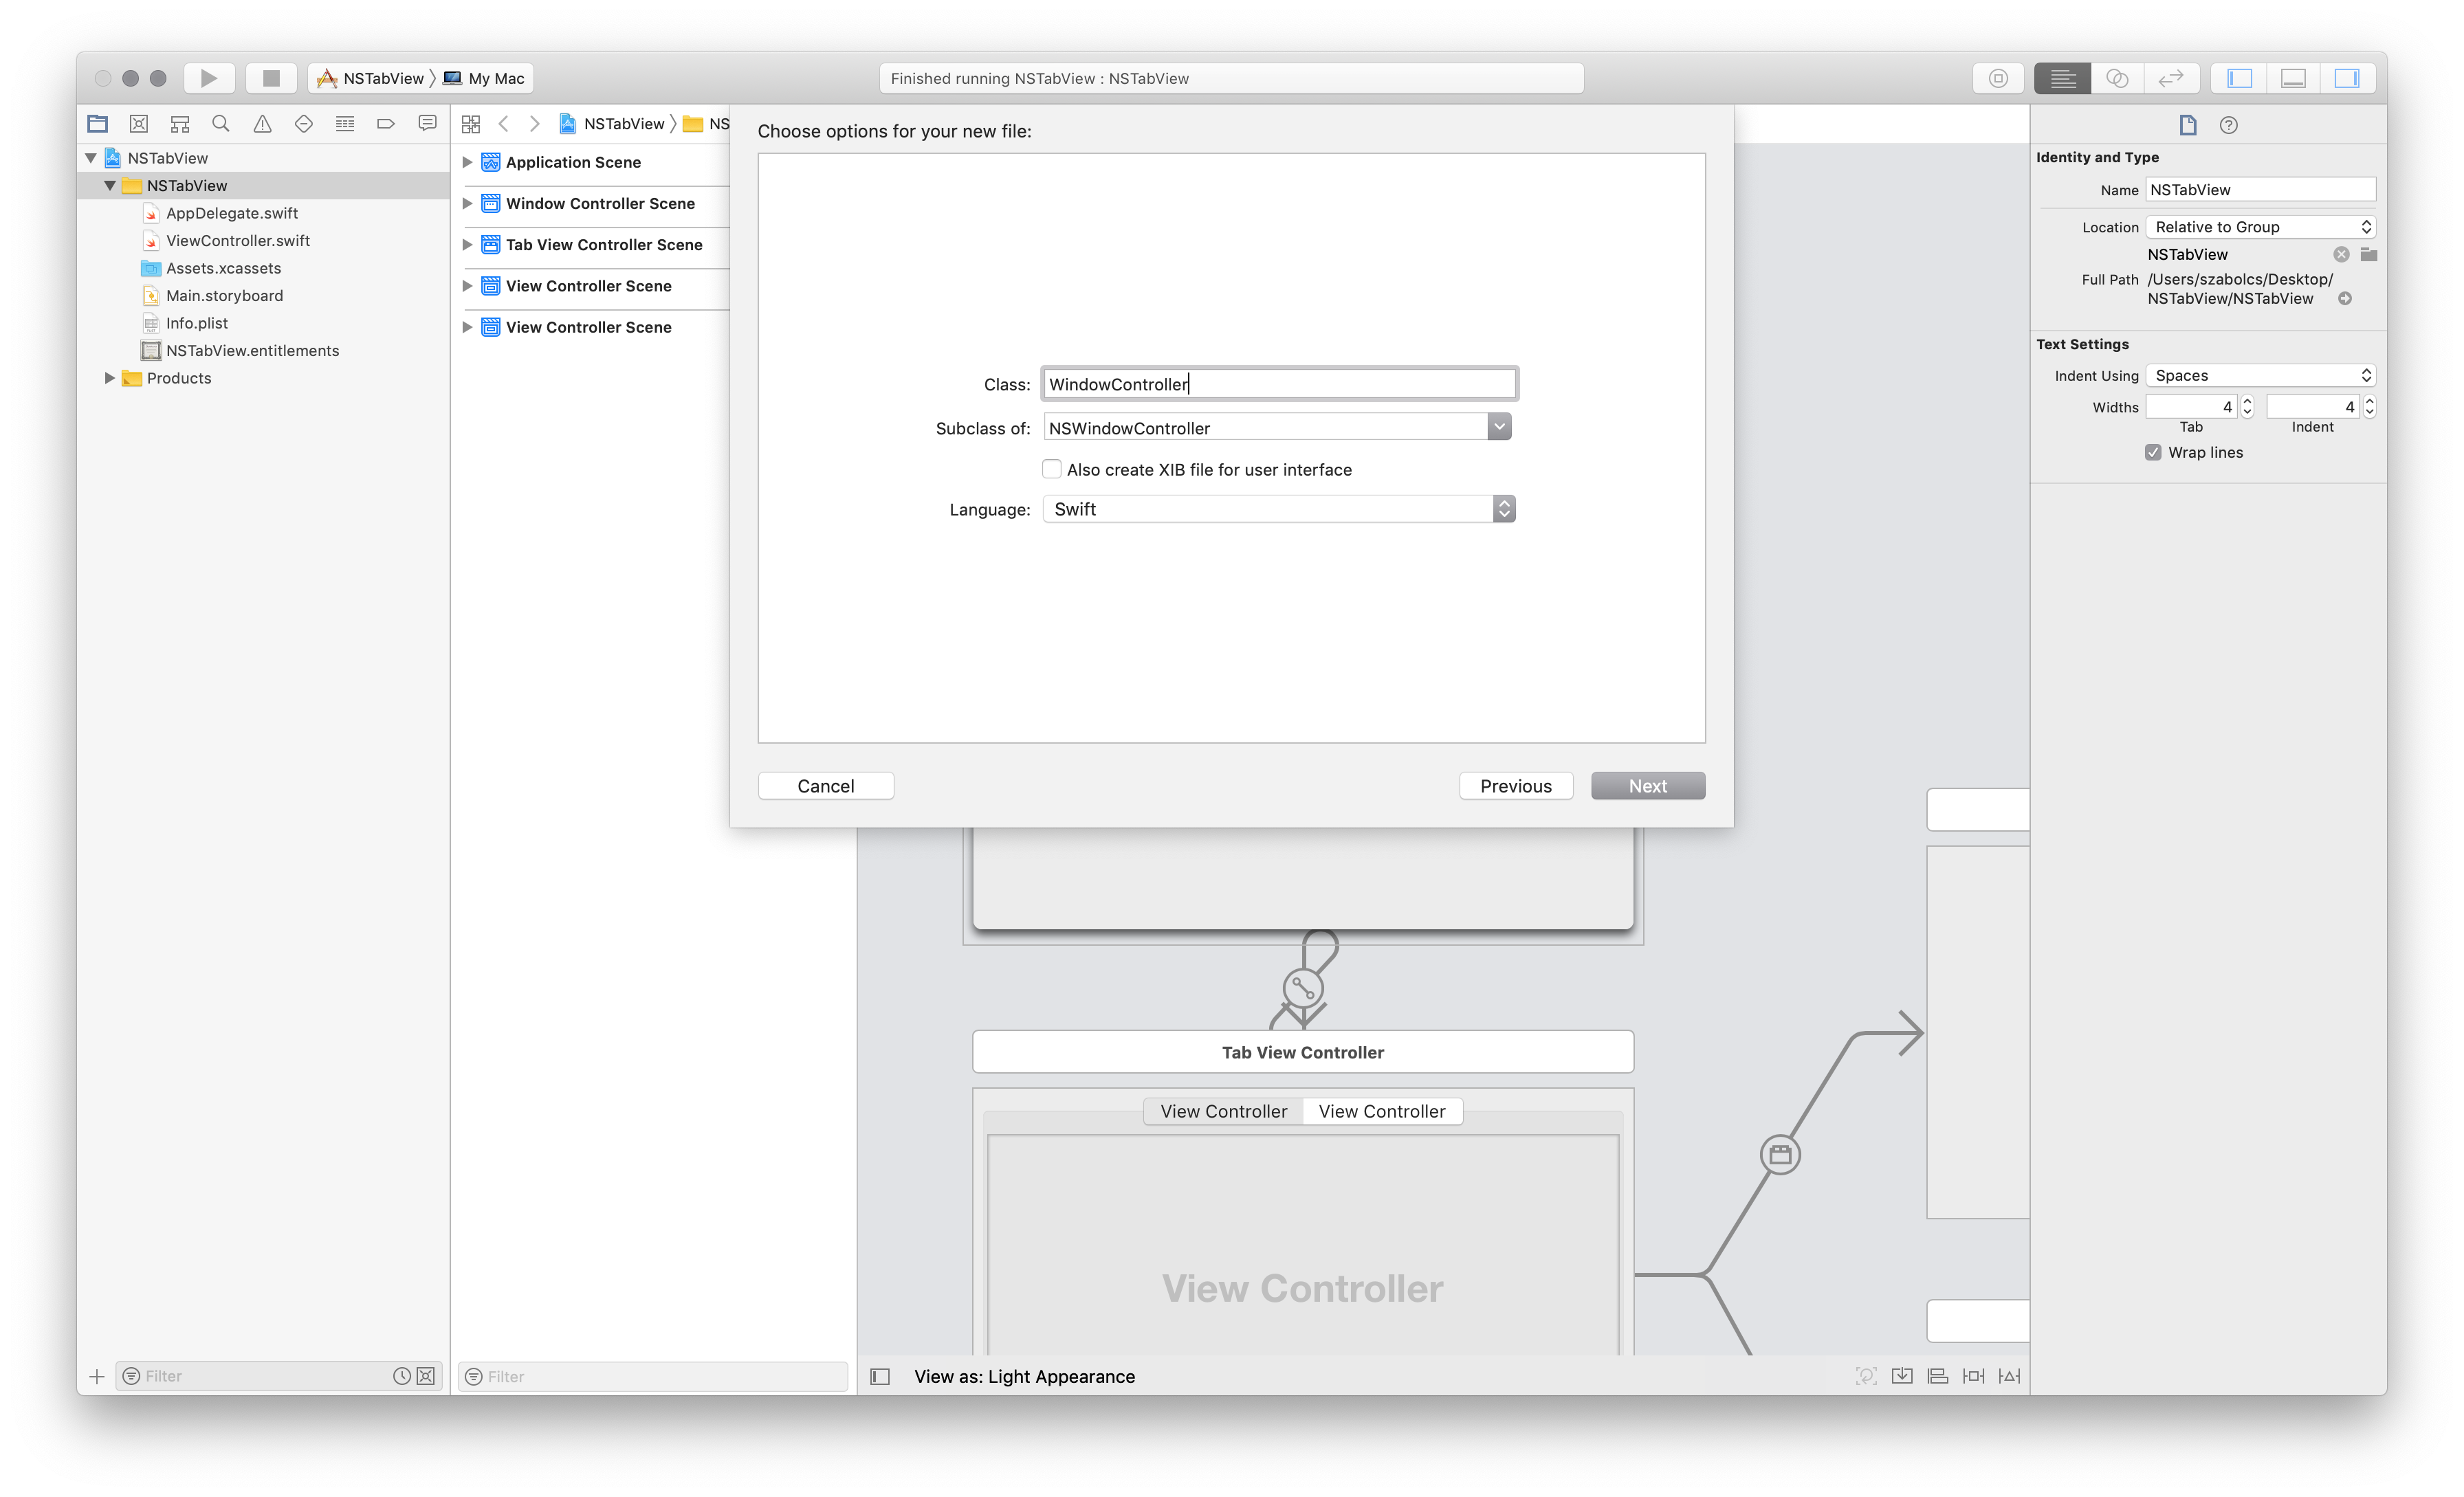
Step 9. Make your main window use this newly created class
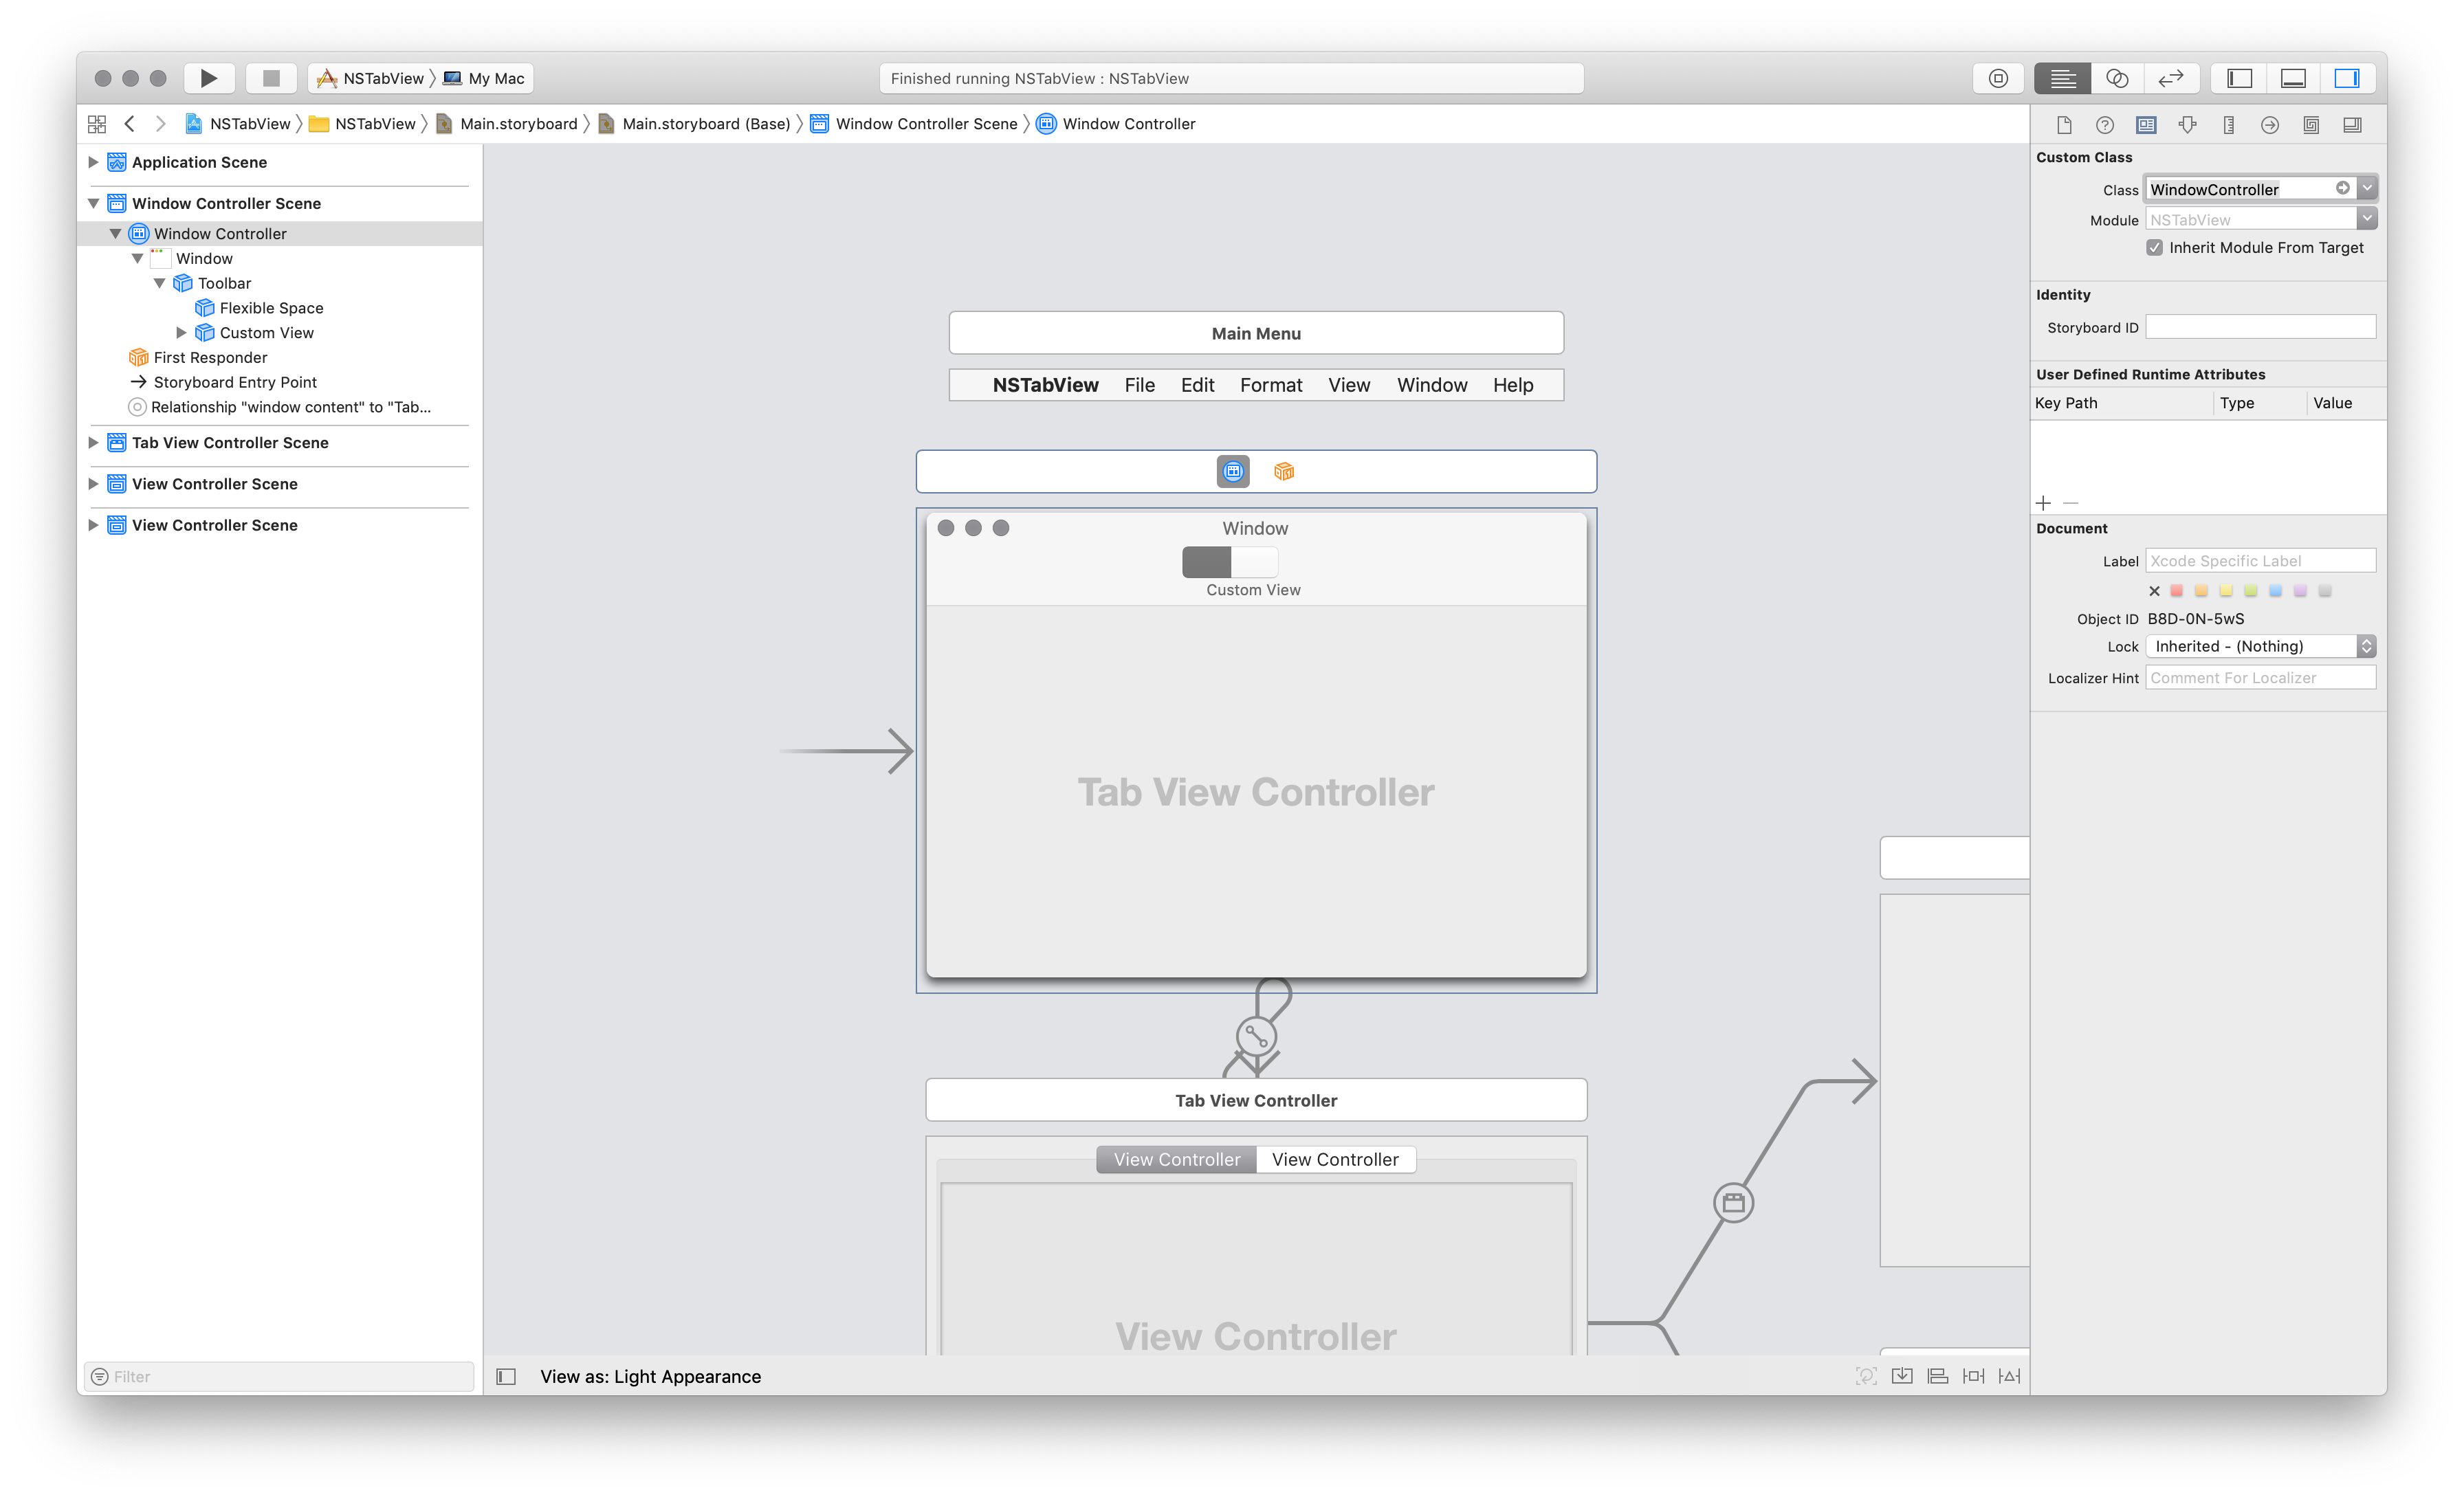
Step 10. Connect your NSSegmentedControl to your new WindowController class
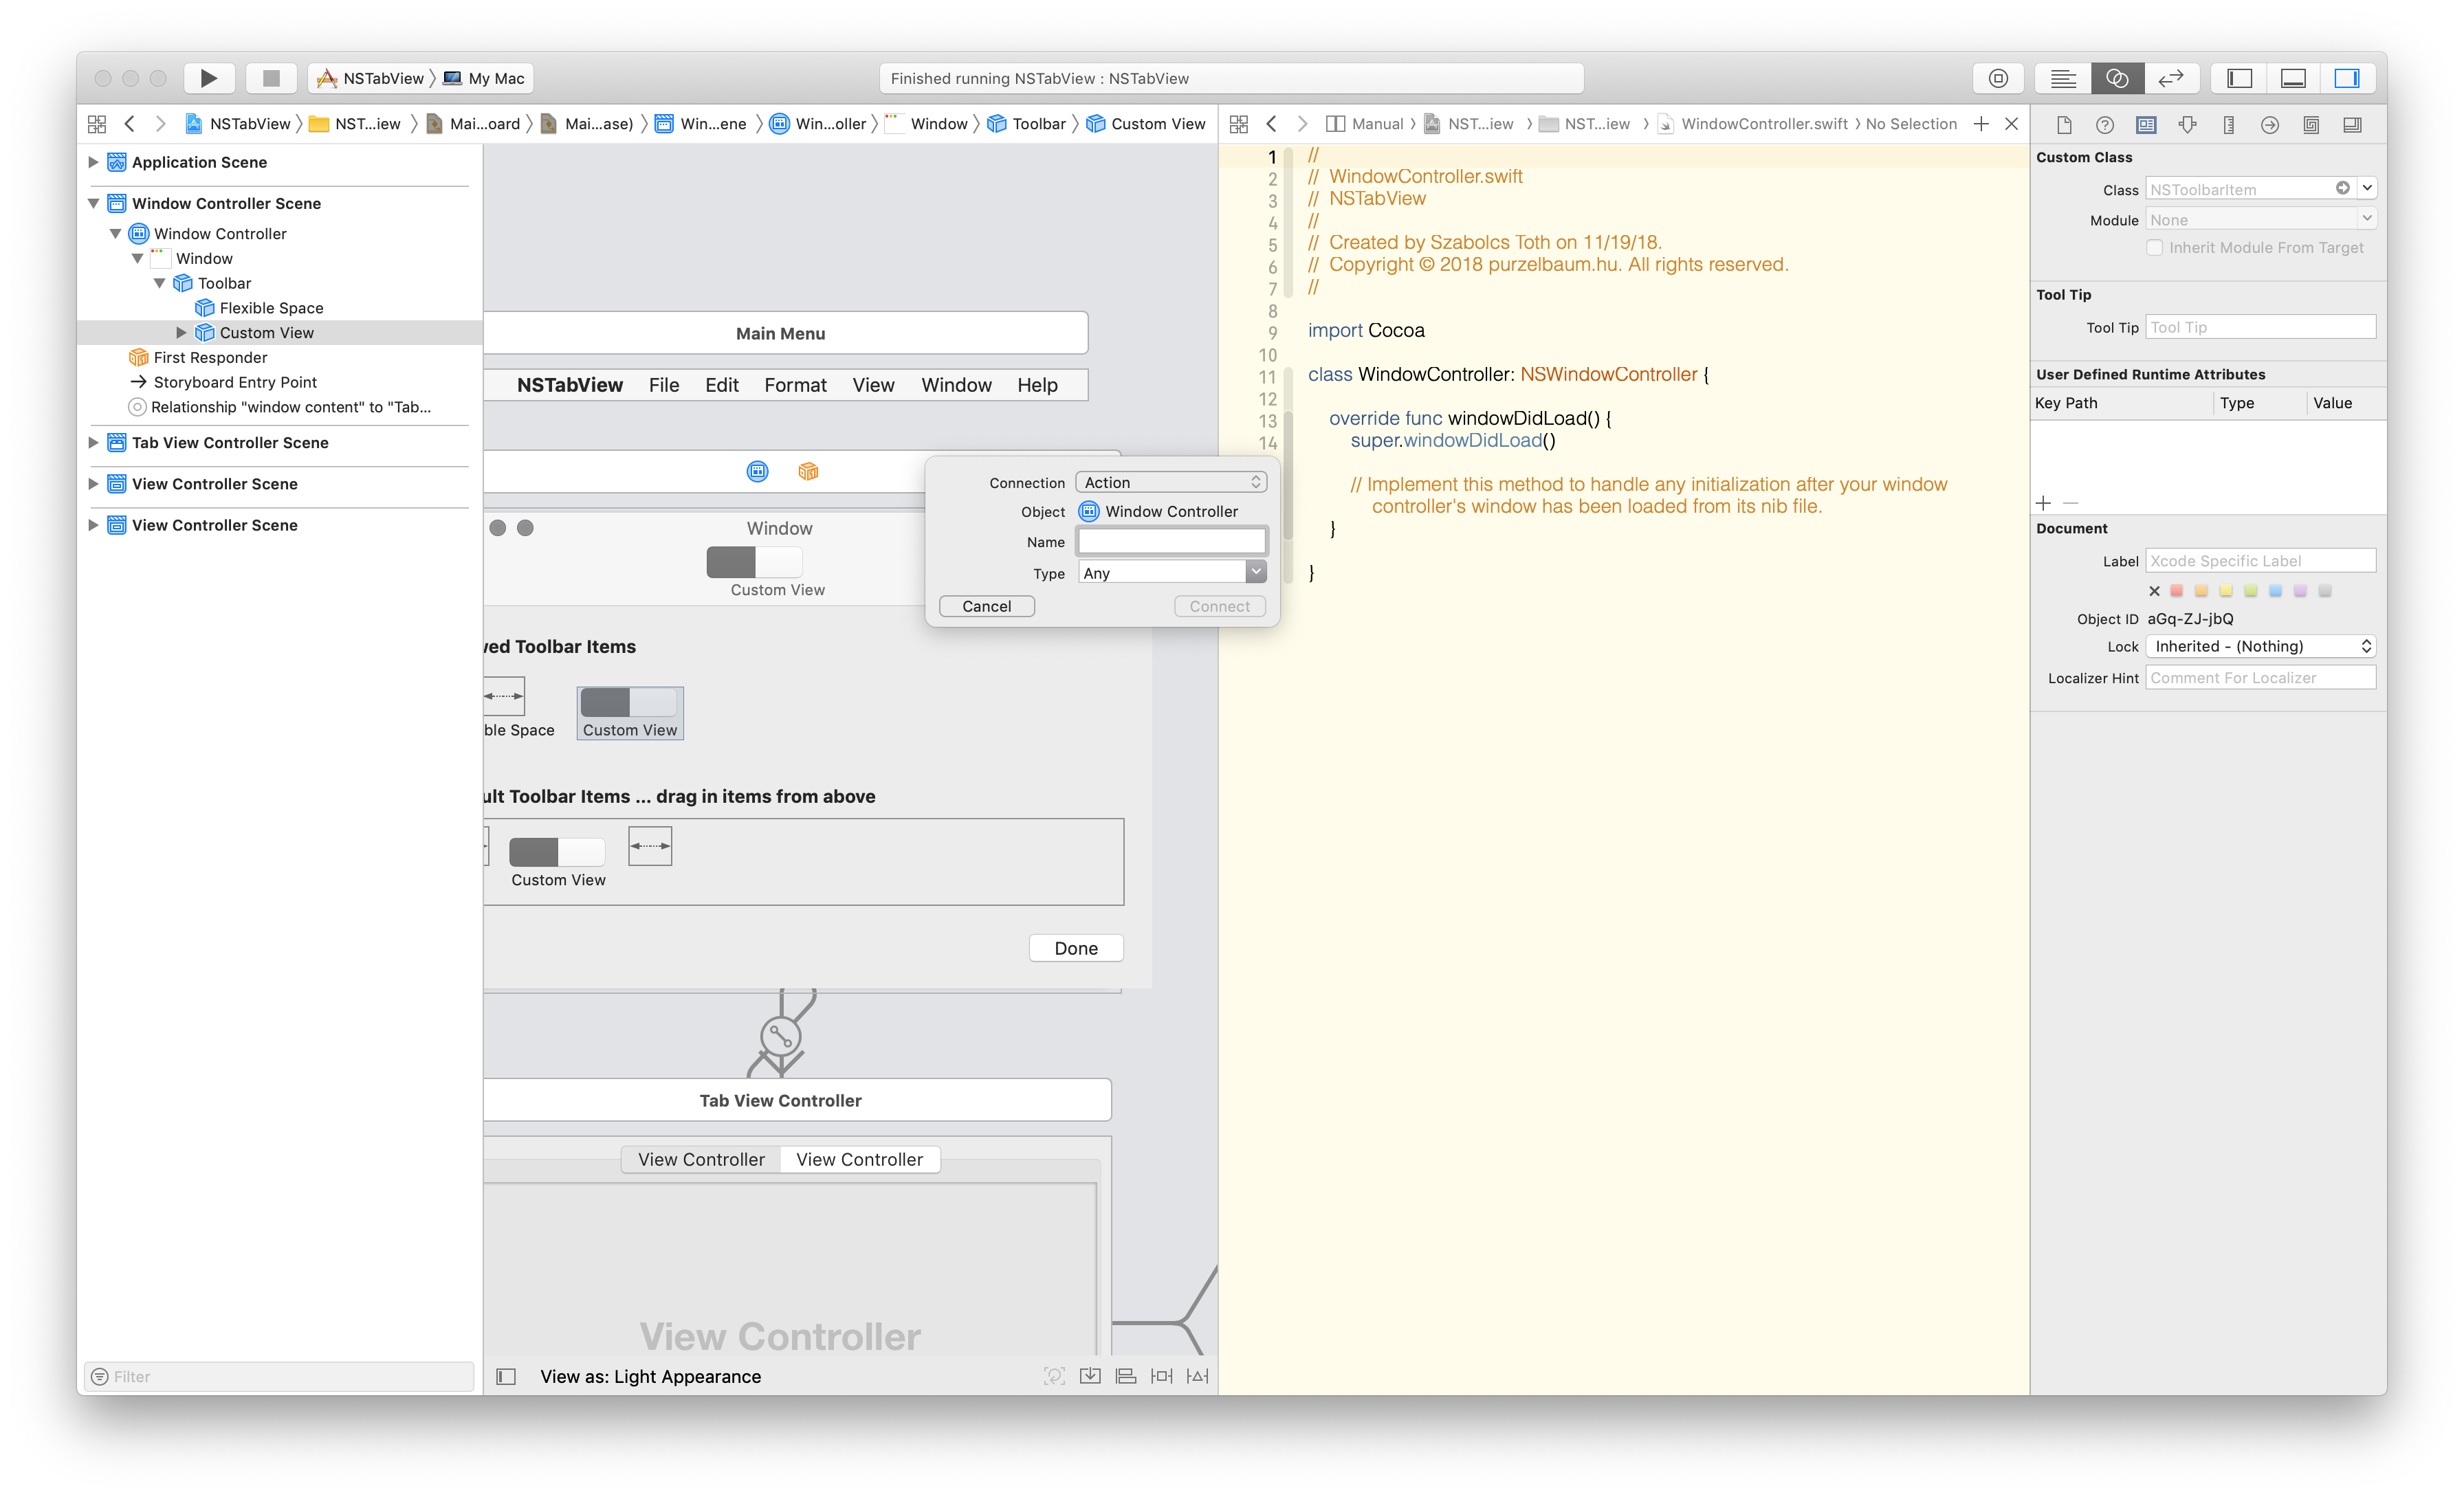
// This is your newly added action
@IBAction func segmentedControlSwitched(_ sender: Any) {
}
Implement the following inside the method:
 @IBAction func segmentedControlSwitched(_ sender: Any) {
  let segmentedControl = sender as! NSSegmentedControl

  self.tabViewController?.selectedTabViewItemIndex = segmentedControl.selectedSegment
}
Step 11. Add two more line to WindowController class, to match the code below
import Cocoa

class WindowController: NSWindowController {

var tabViewController: NSTabViewController?

  override func windowDidLoad() {
    super.windowDidLoad()

    self.tabViewController = self.window?.contentViewController as? NSTabViewController

  }
  @IBAction func segmentedControlSwitched(_ sender: Any) {
    let segmentedControl = sender as! NSSegmentedControl

    self.tabViewController?.selectedTabViewItemIndex = segmentedControl.selectedSegment
  }
}
When you run the code, you realize something went wrong. This is quite far from what we wanted…
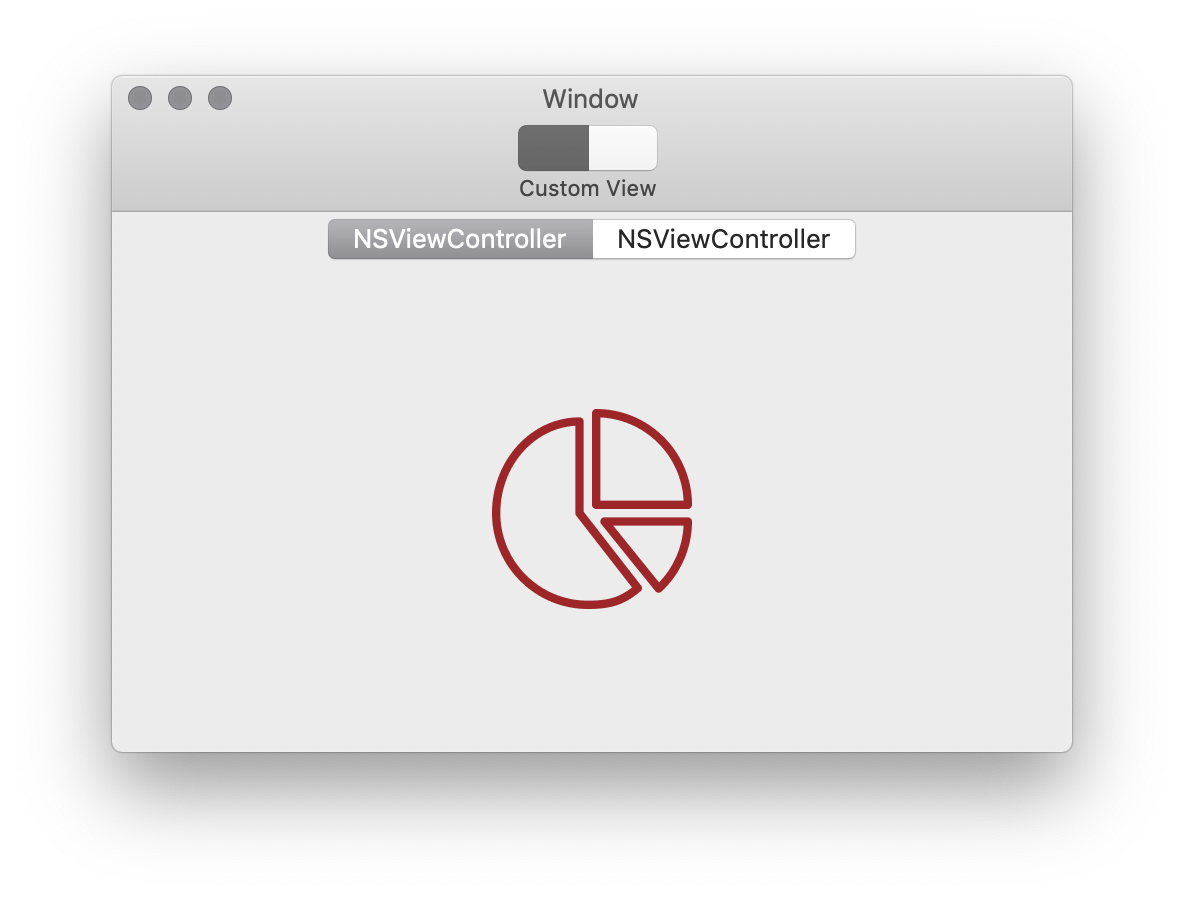
Step 12. Do the “magic”
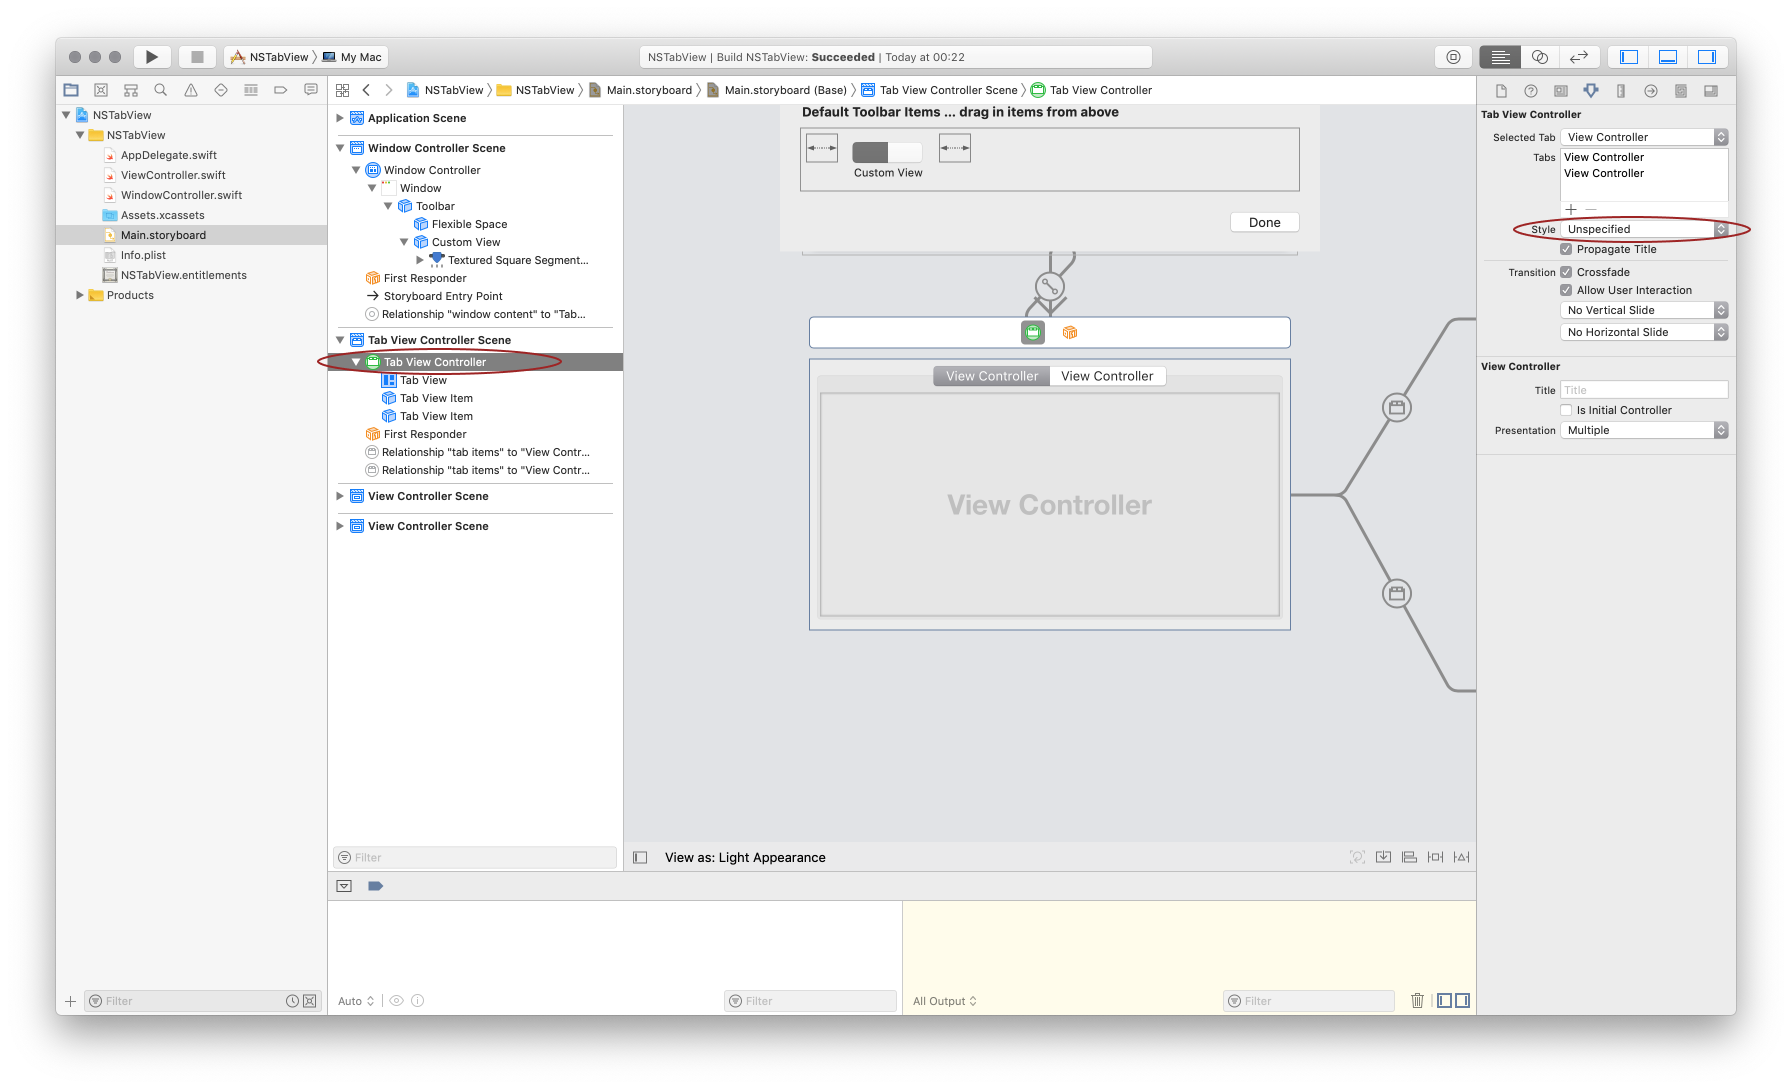
Select the “Tab View Controller” on the Storyboard, and change the Style “Unspecified” in the Attribute Inspector tab.
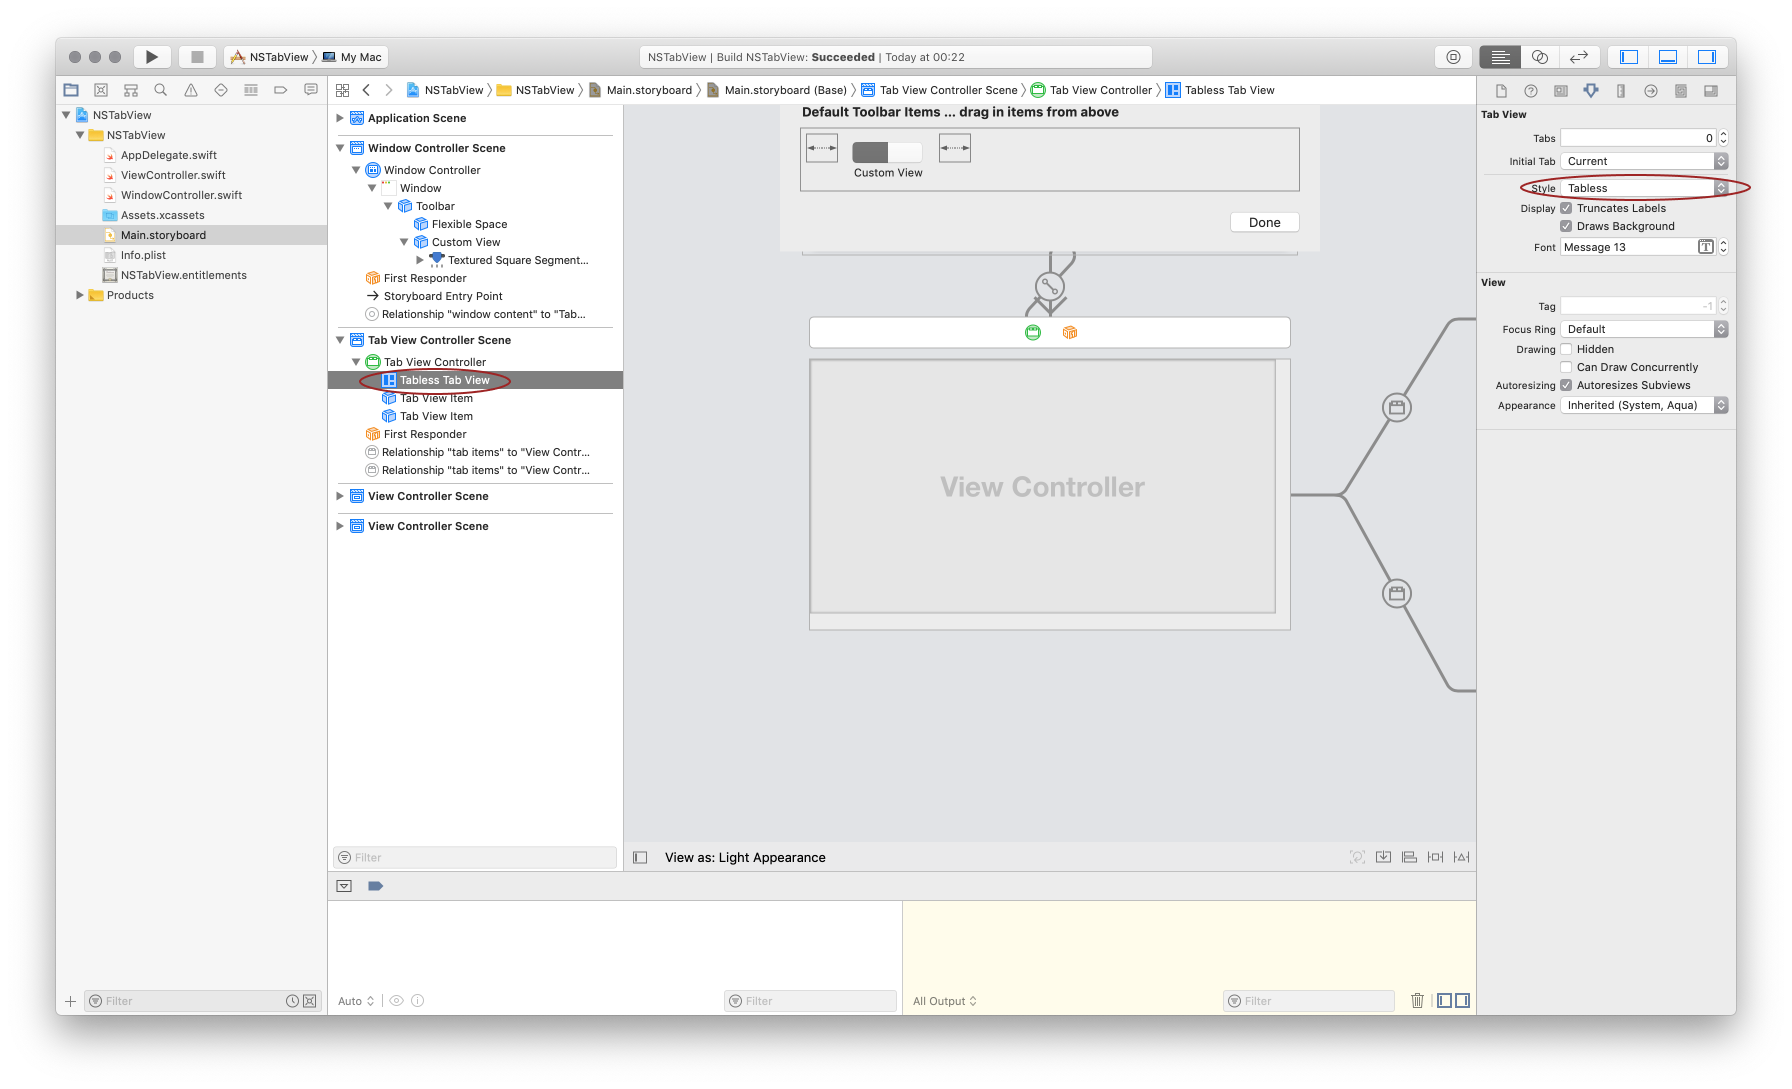
Then, select the “Tab View” and change the Style to “Tabless”.
Let’s try now…
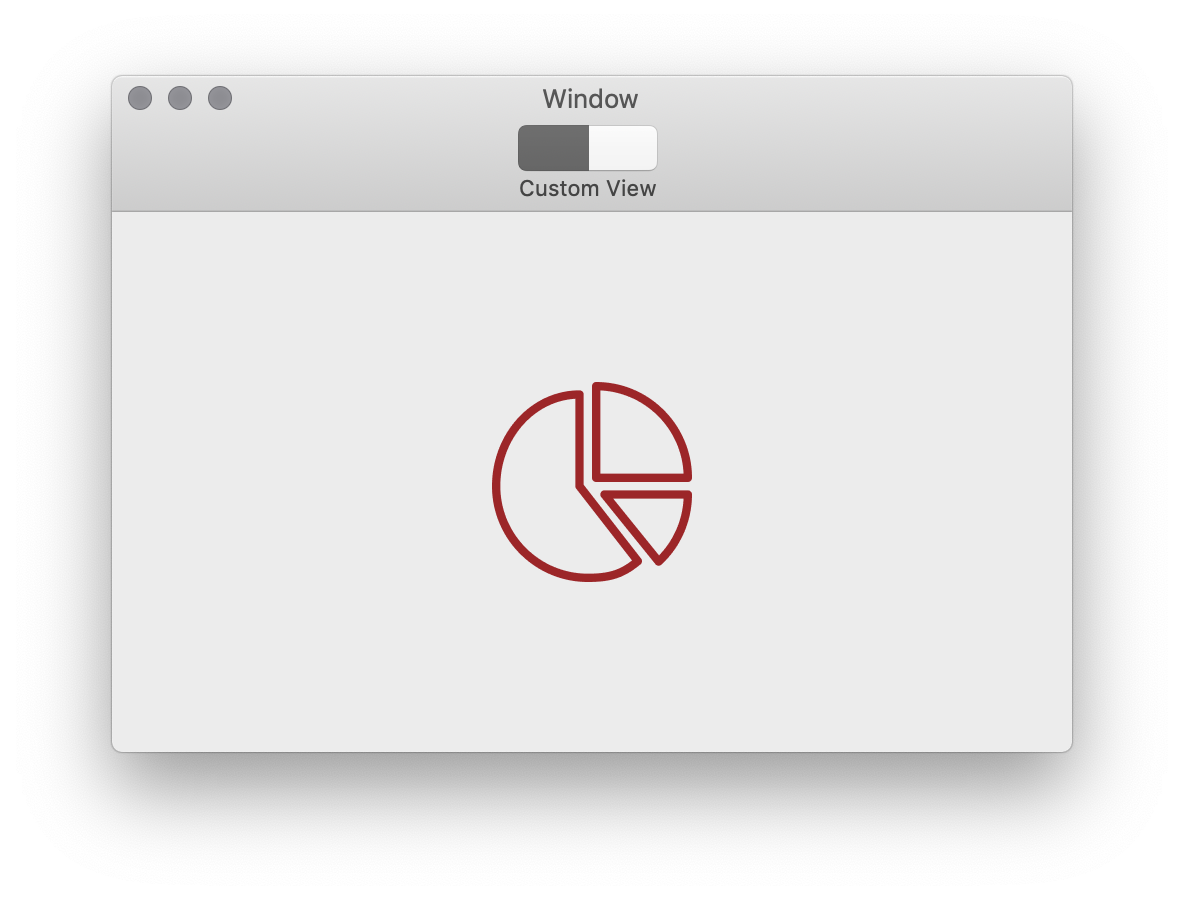
Looks much better…
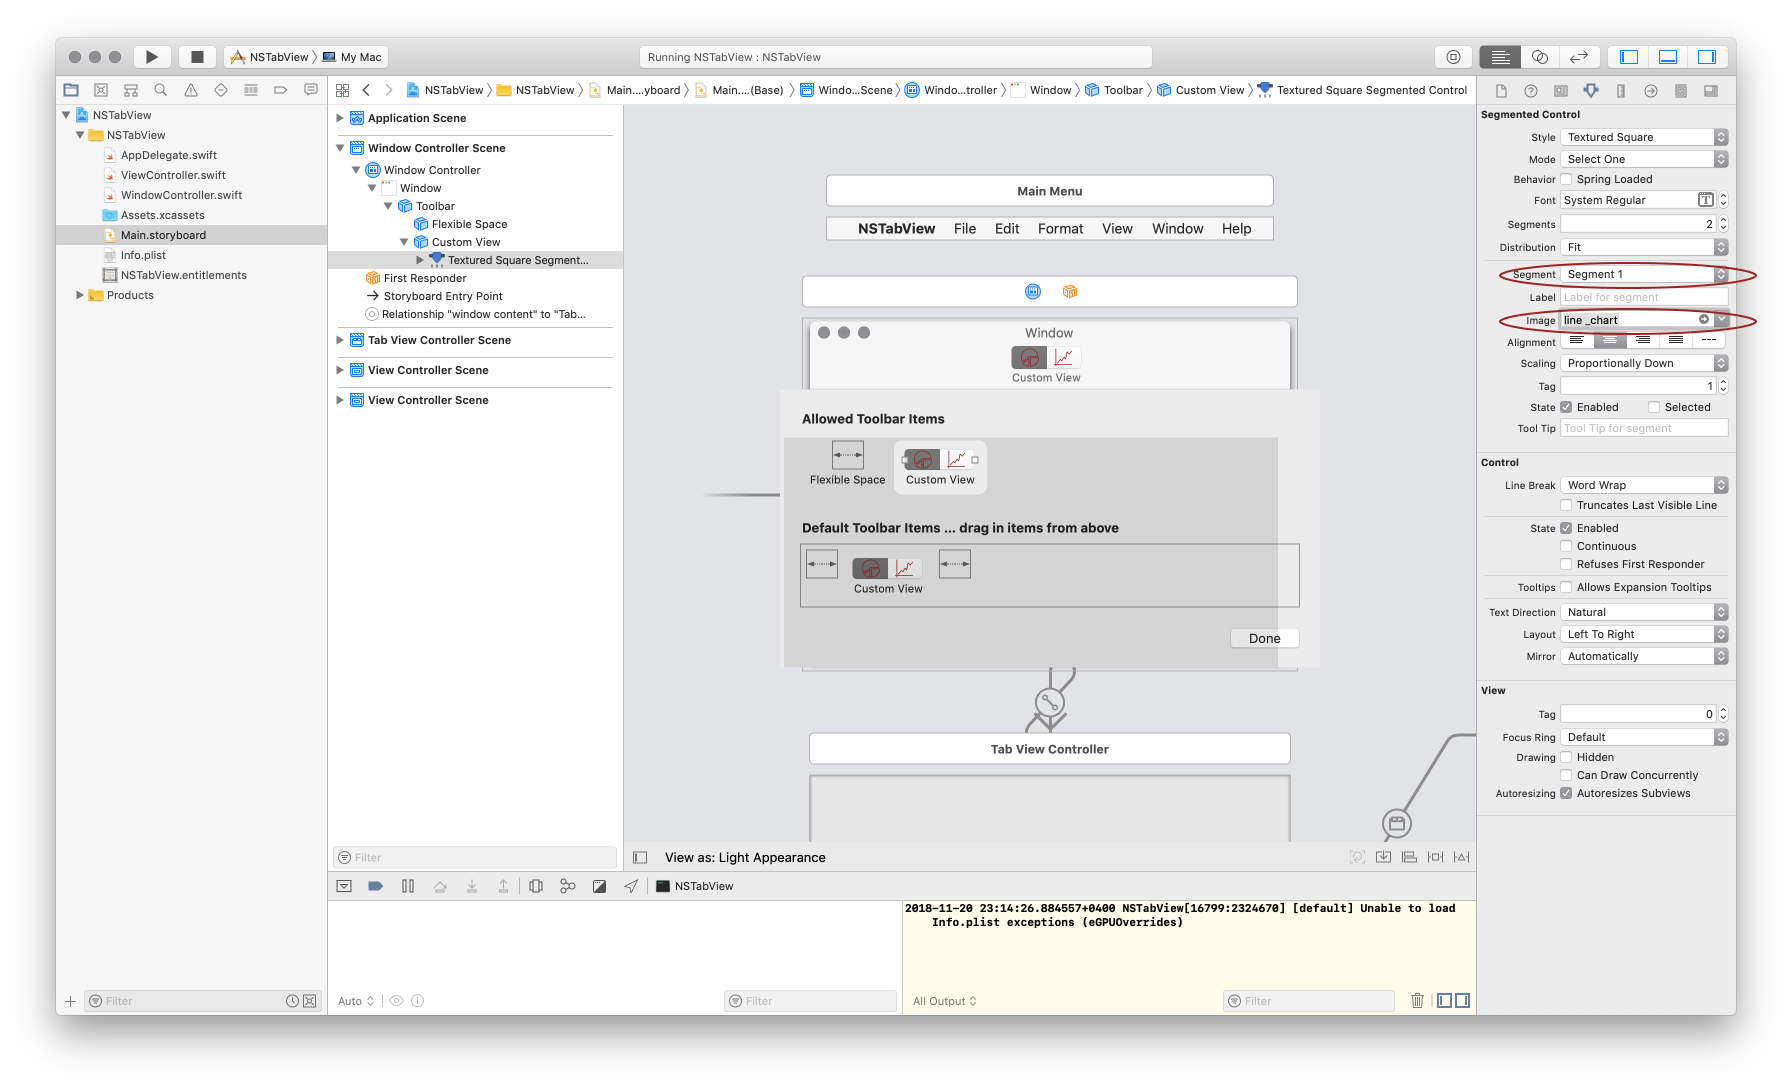
Step 13. Add images to segmented control
Select the Segmented Control and on the Attributes Inspector tab, set an image to Segment 0.
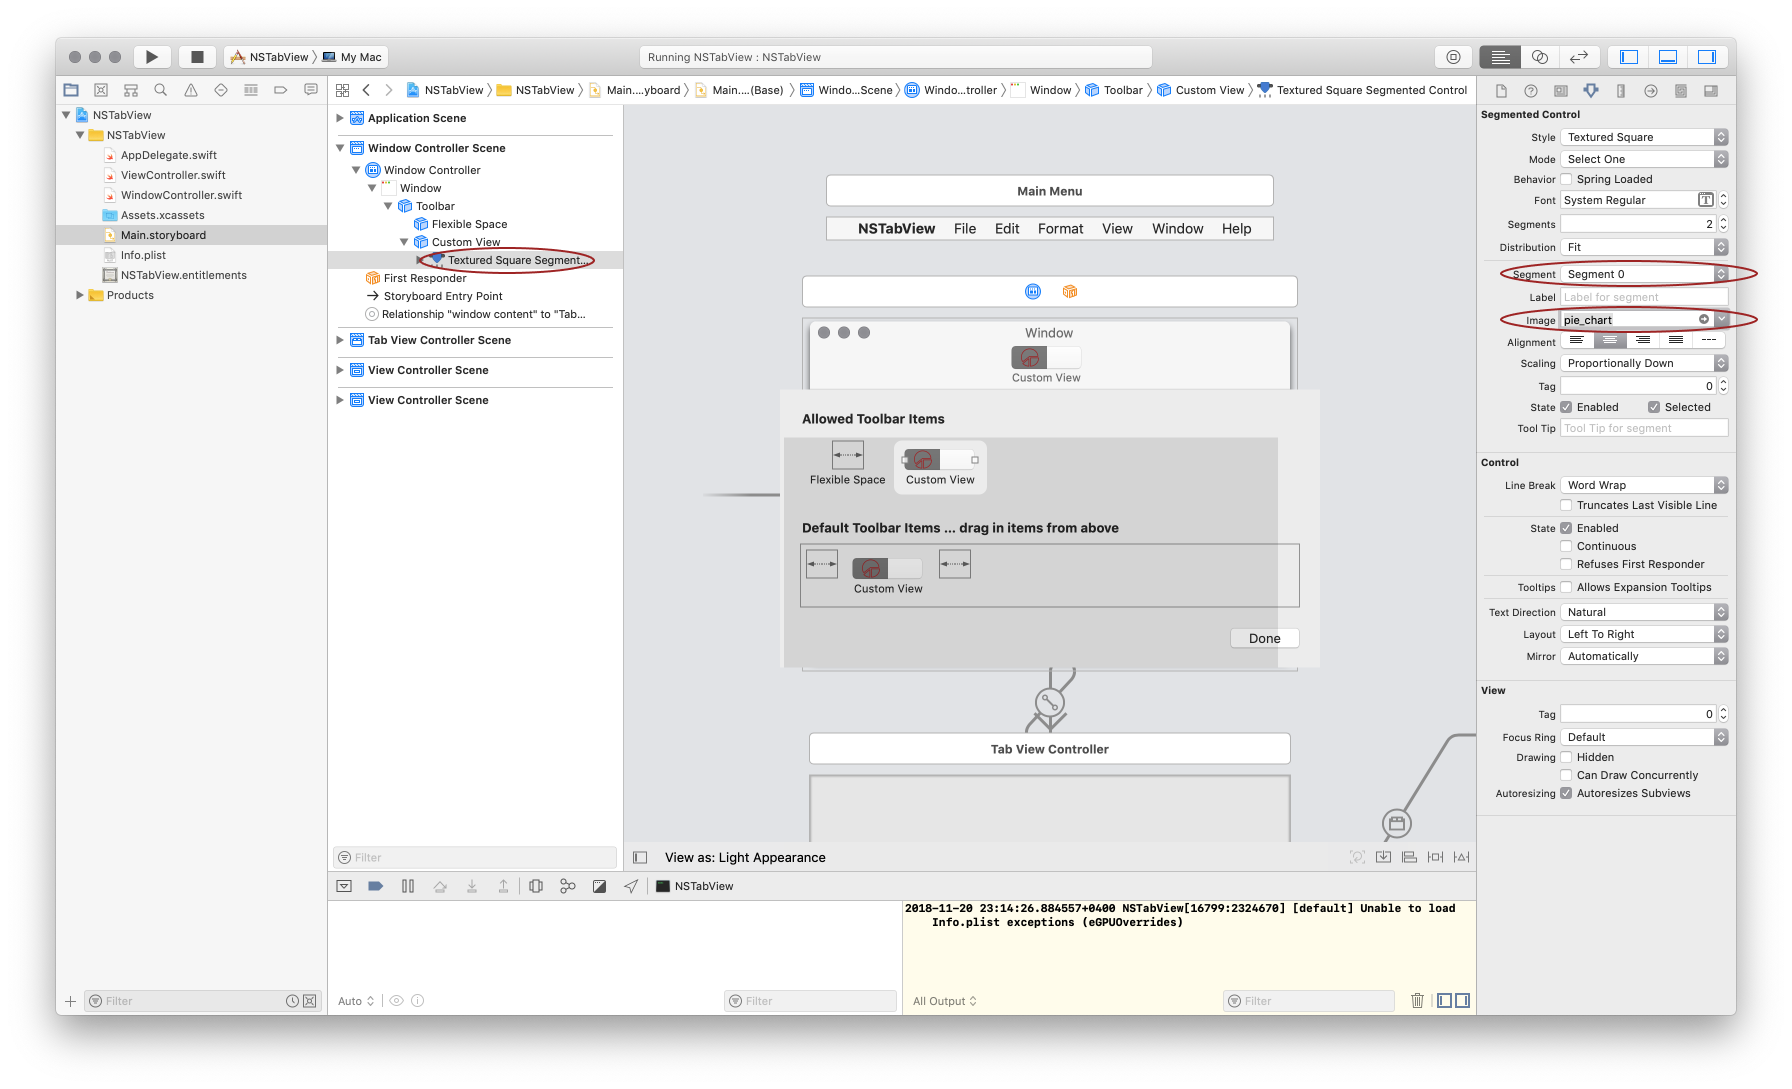
Repeat the previous step on Segment 1 as well.
Step 14. The final touch
Add the following code in the windowDidLoad method in your WindowController:
 if let window = window {
  if let view = window.contentView {
    view.wantsLayer = true
    window.titleVisibility = .hidden
    window.titlebarAppearsTransparent = true
    window.backgroundColor = .white
  }
}
Source code: Github